
Assigning Permissions to Existing Users
You can always modify the user’s permissions to adapt to new requirements.
In this lesson you will learn how to assign permissions to existing users. Follow the steps below to learn how to do it.
1
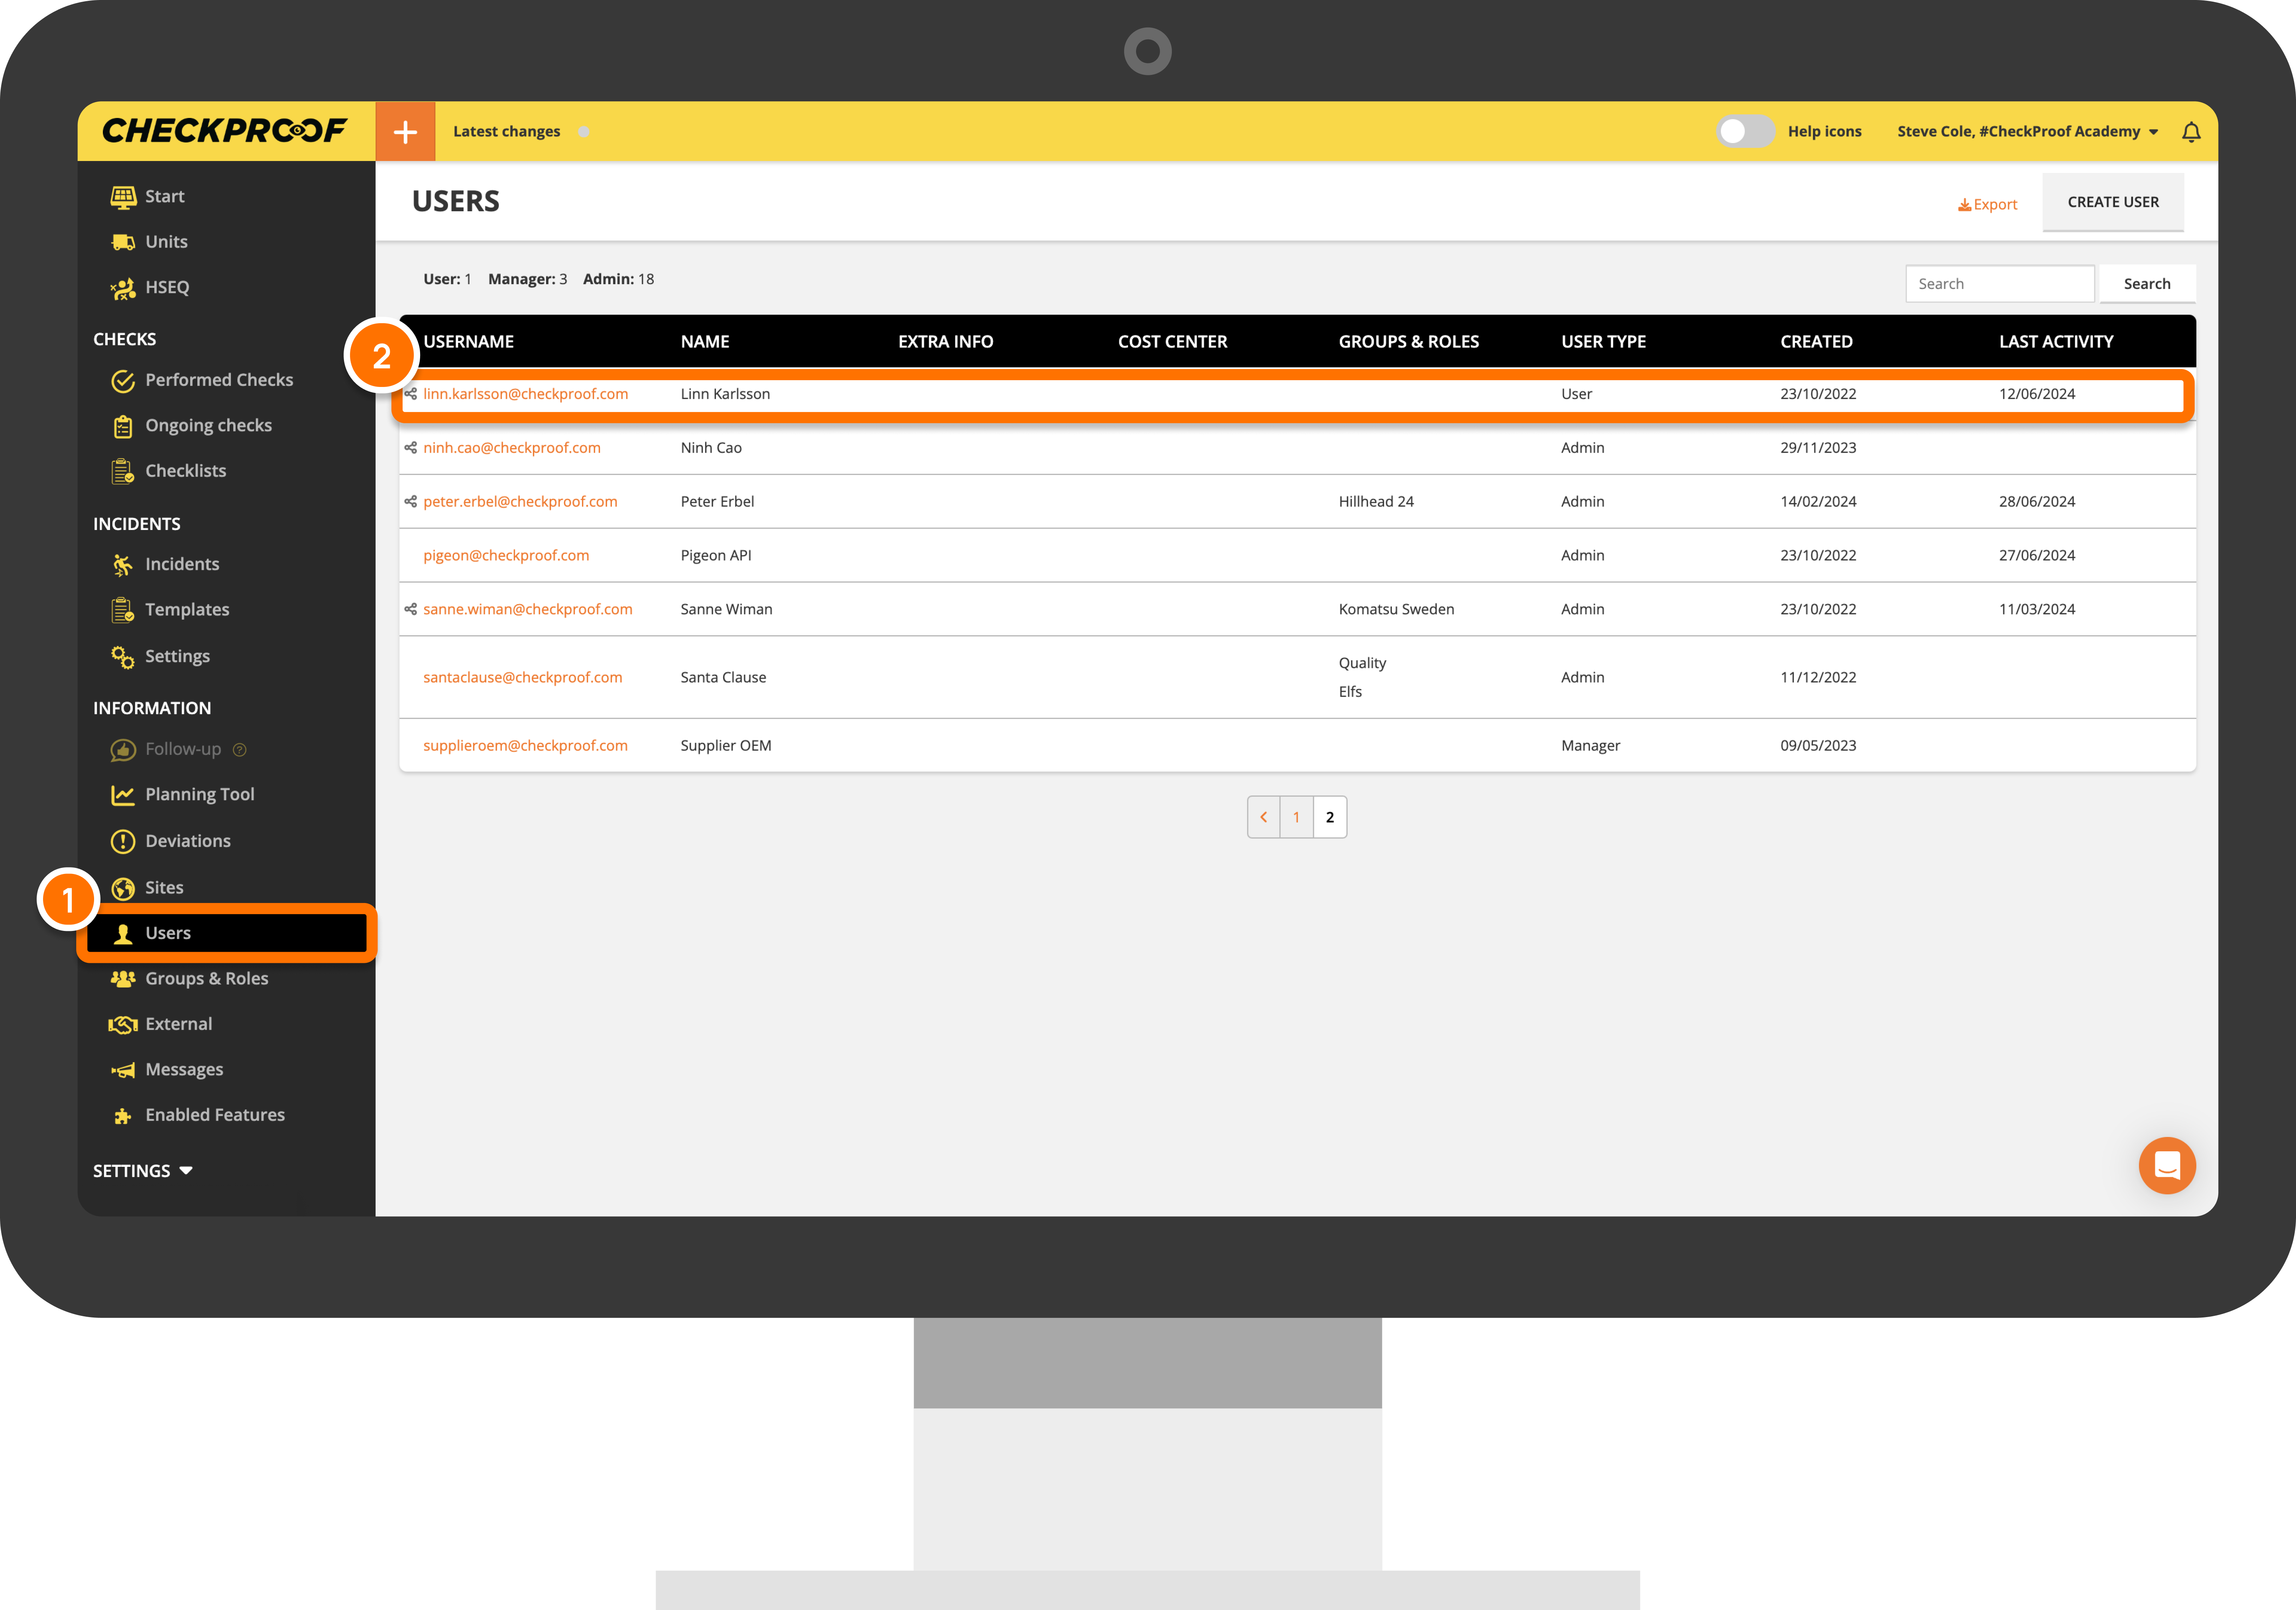
SELECT A USER
First click “Users” in the left-side panel and then select the existing user you want to assign permissions to.
2
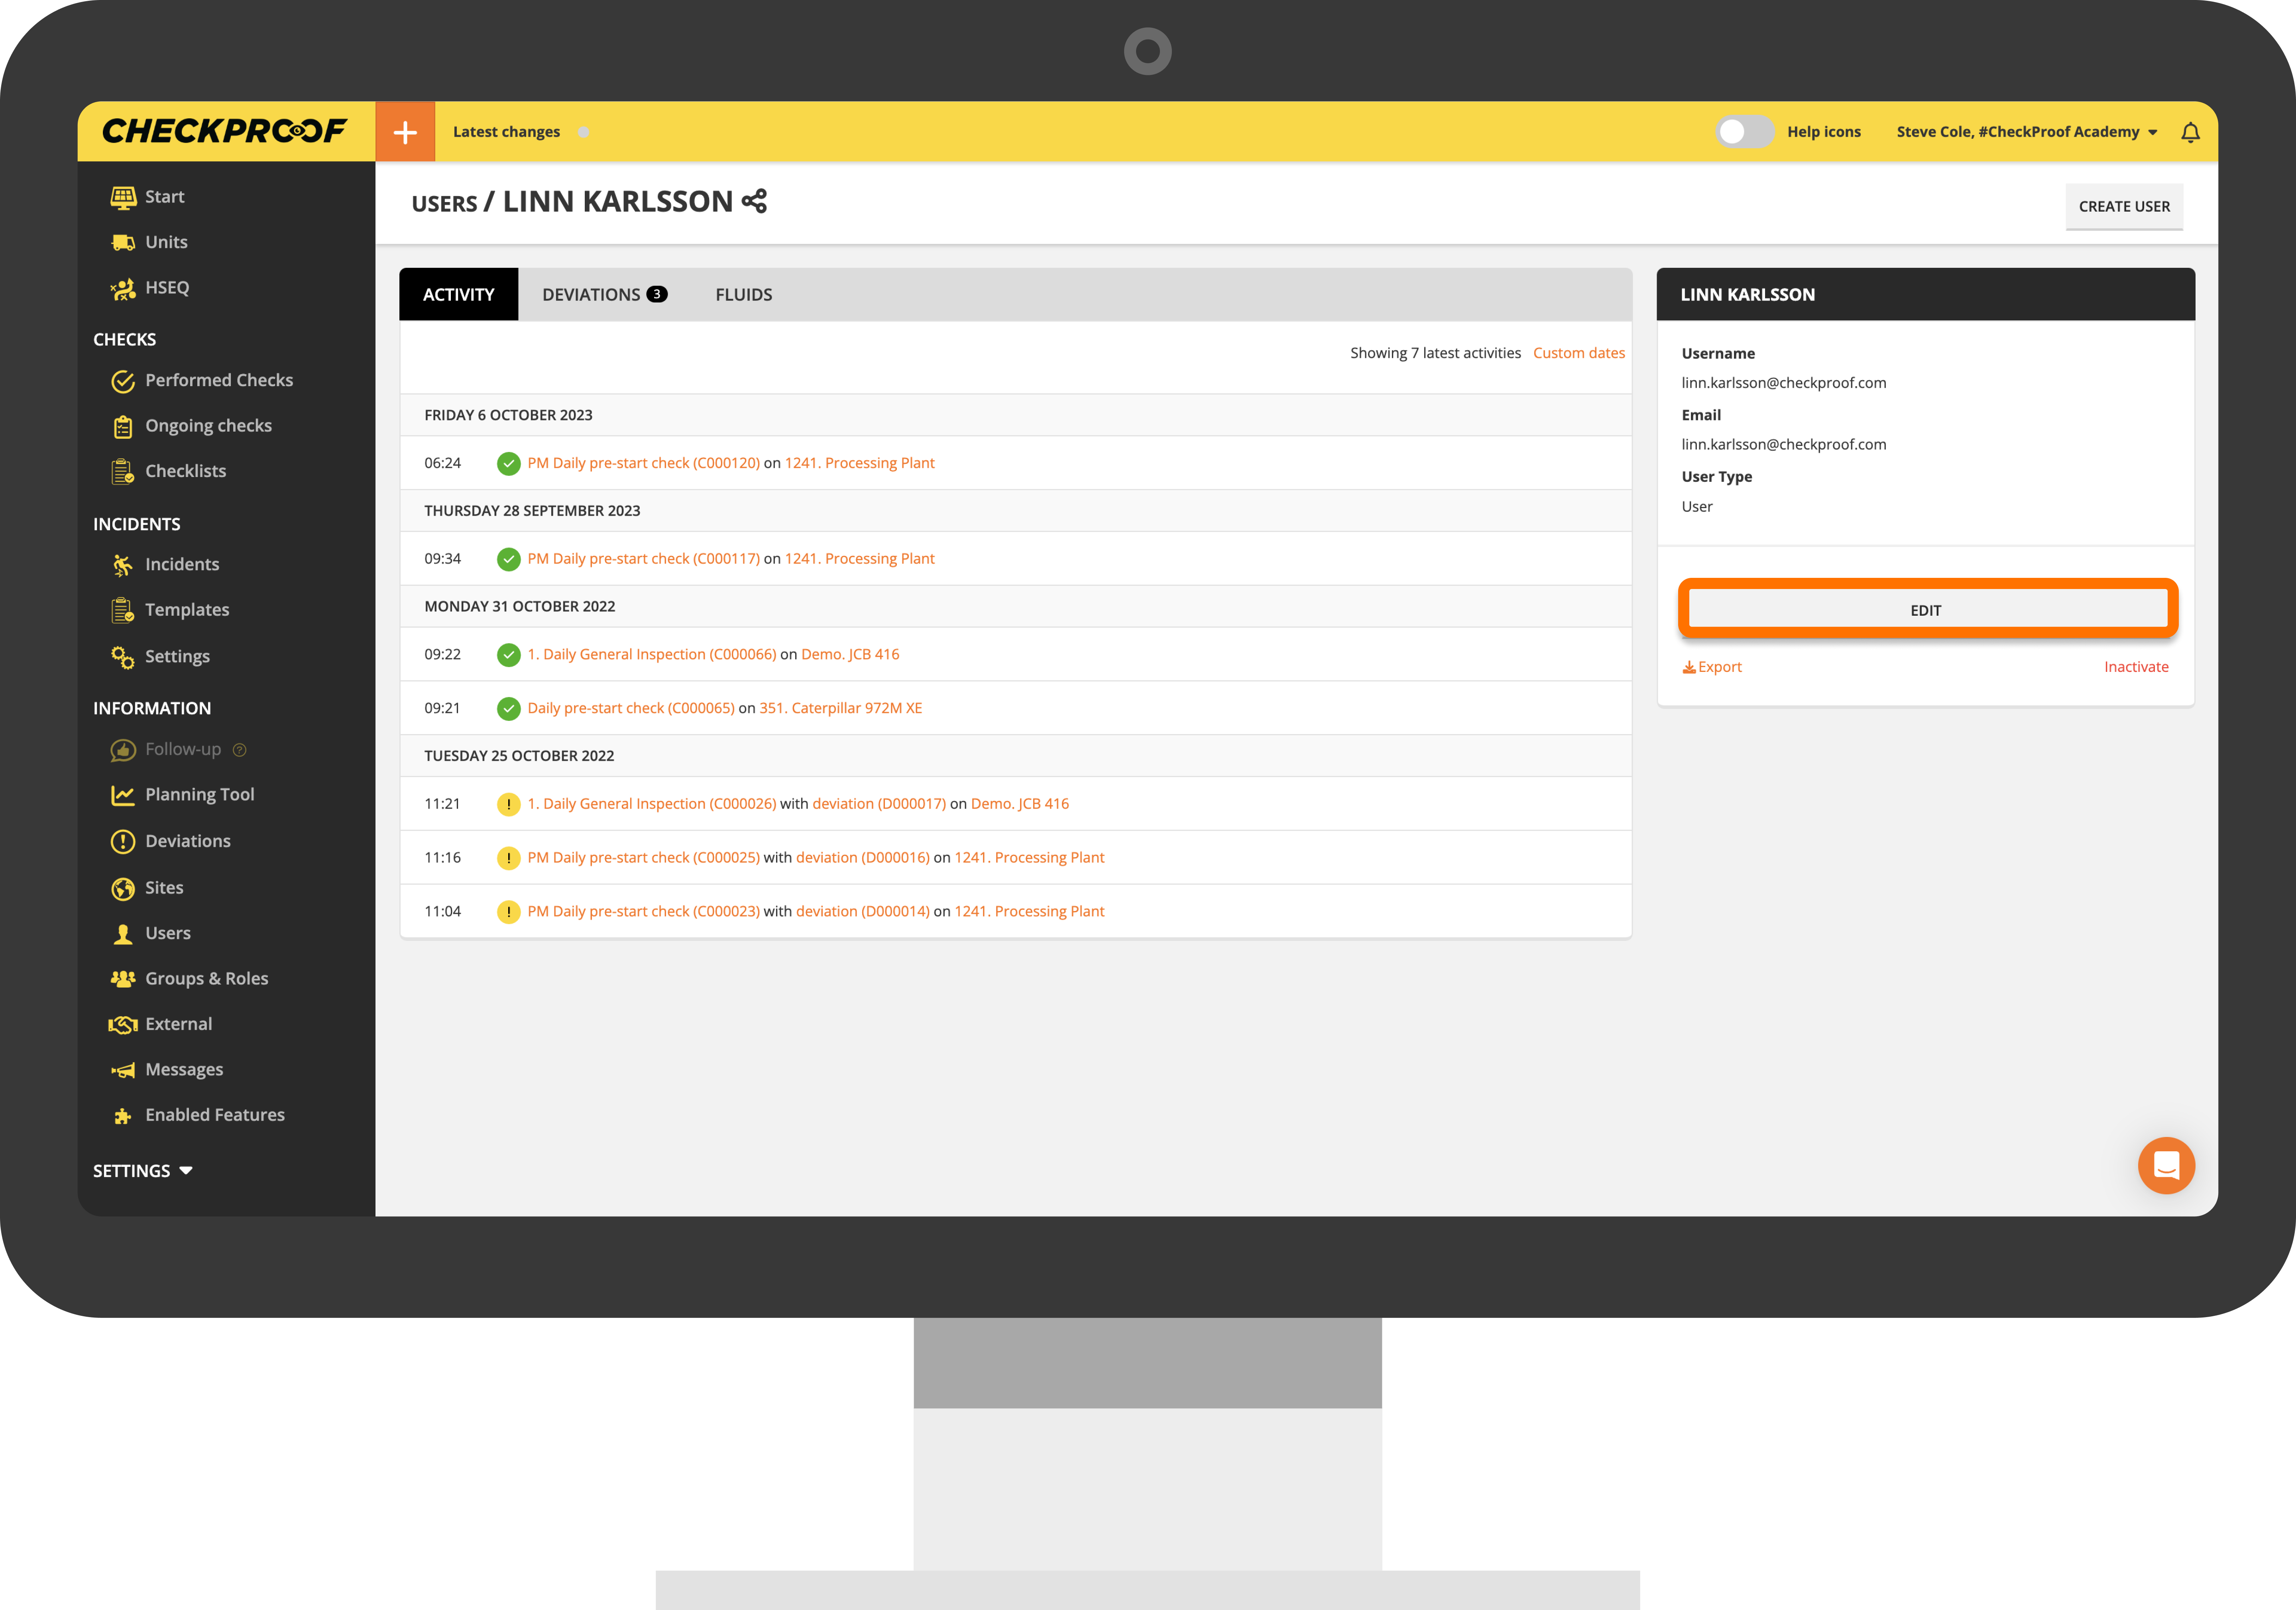
CLICK THE EDIT BUTTON
On this page you can view information related to this user, such as their recent activity and any deviations that are assigned to them.
Here you should click the “Edit” button that is situated under their account information.
3
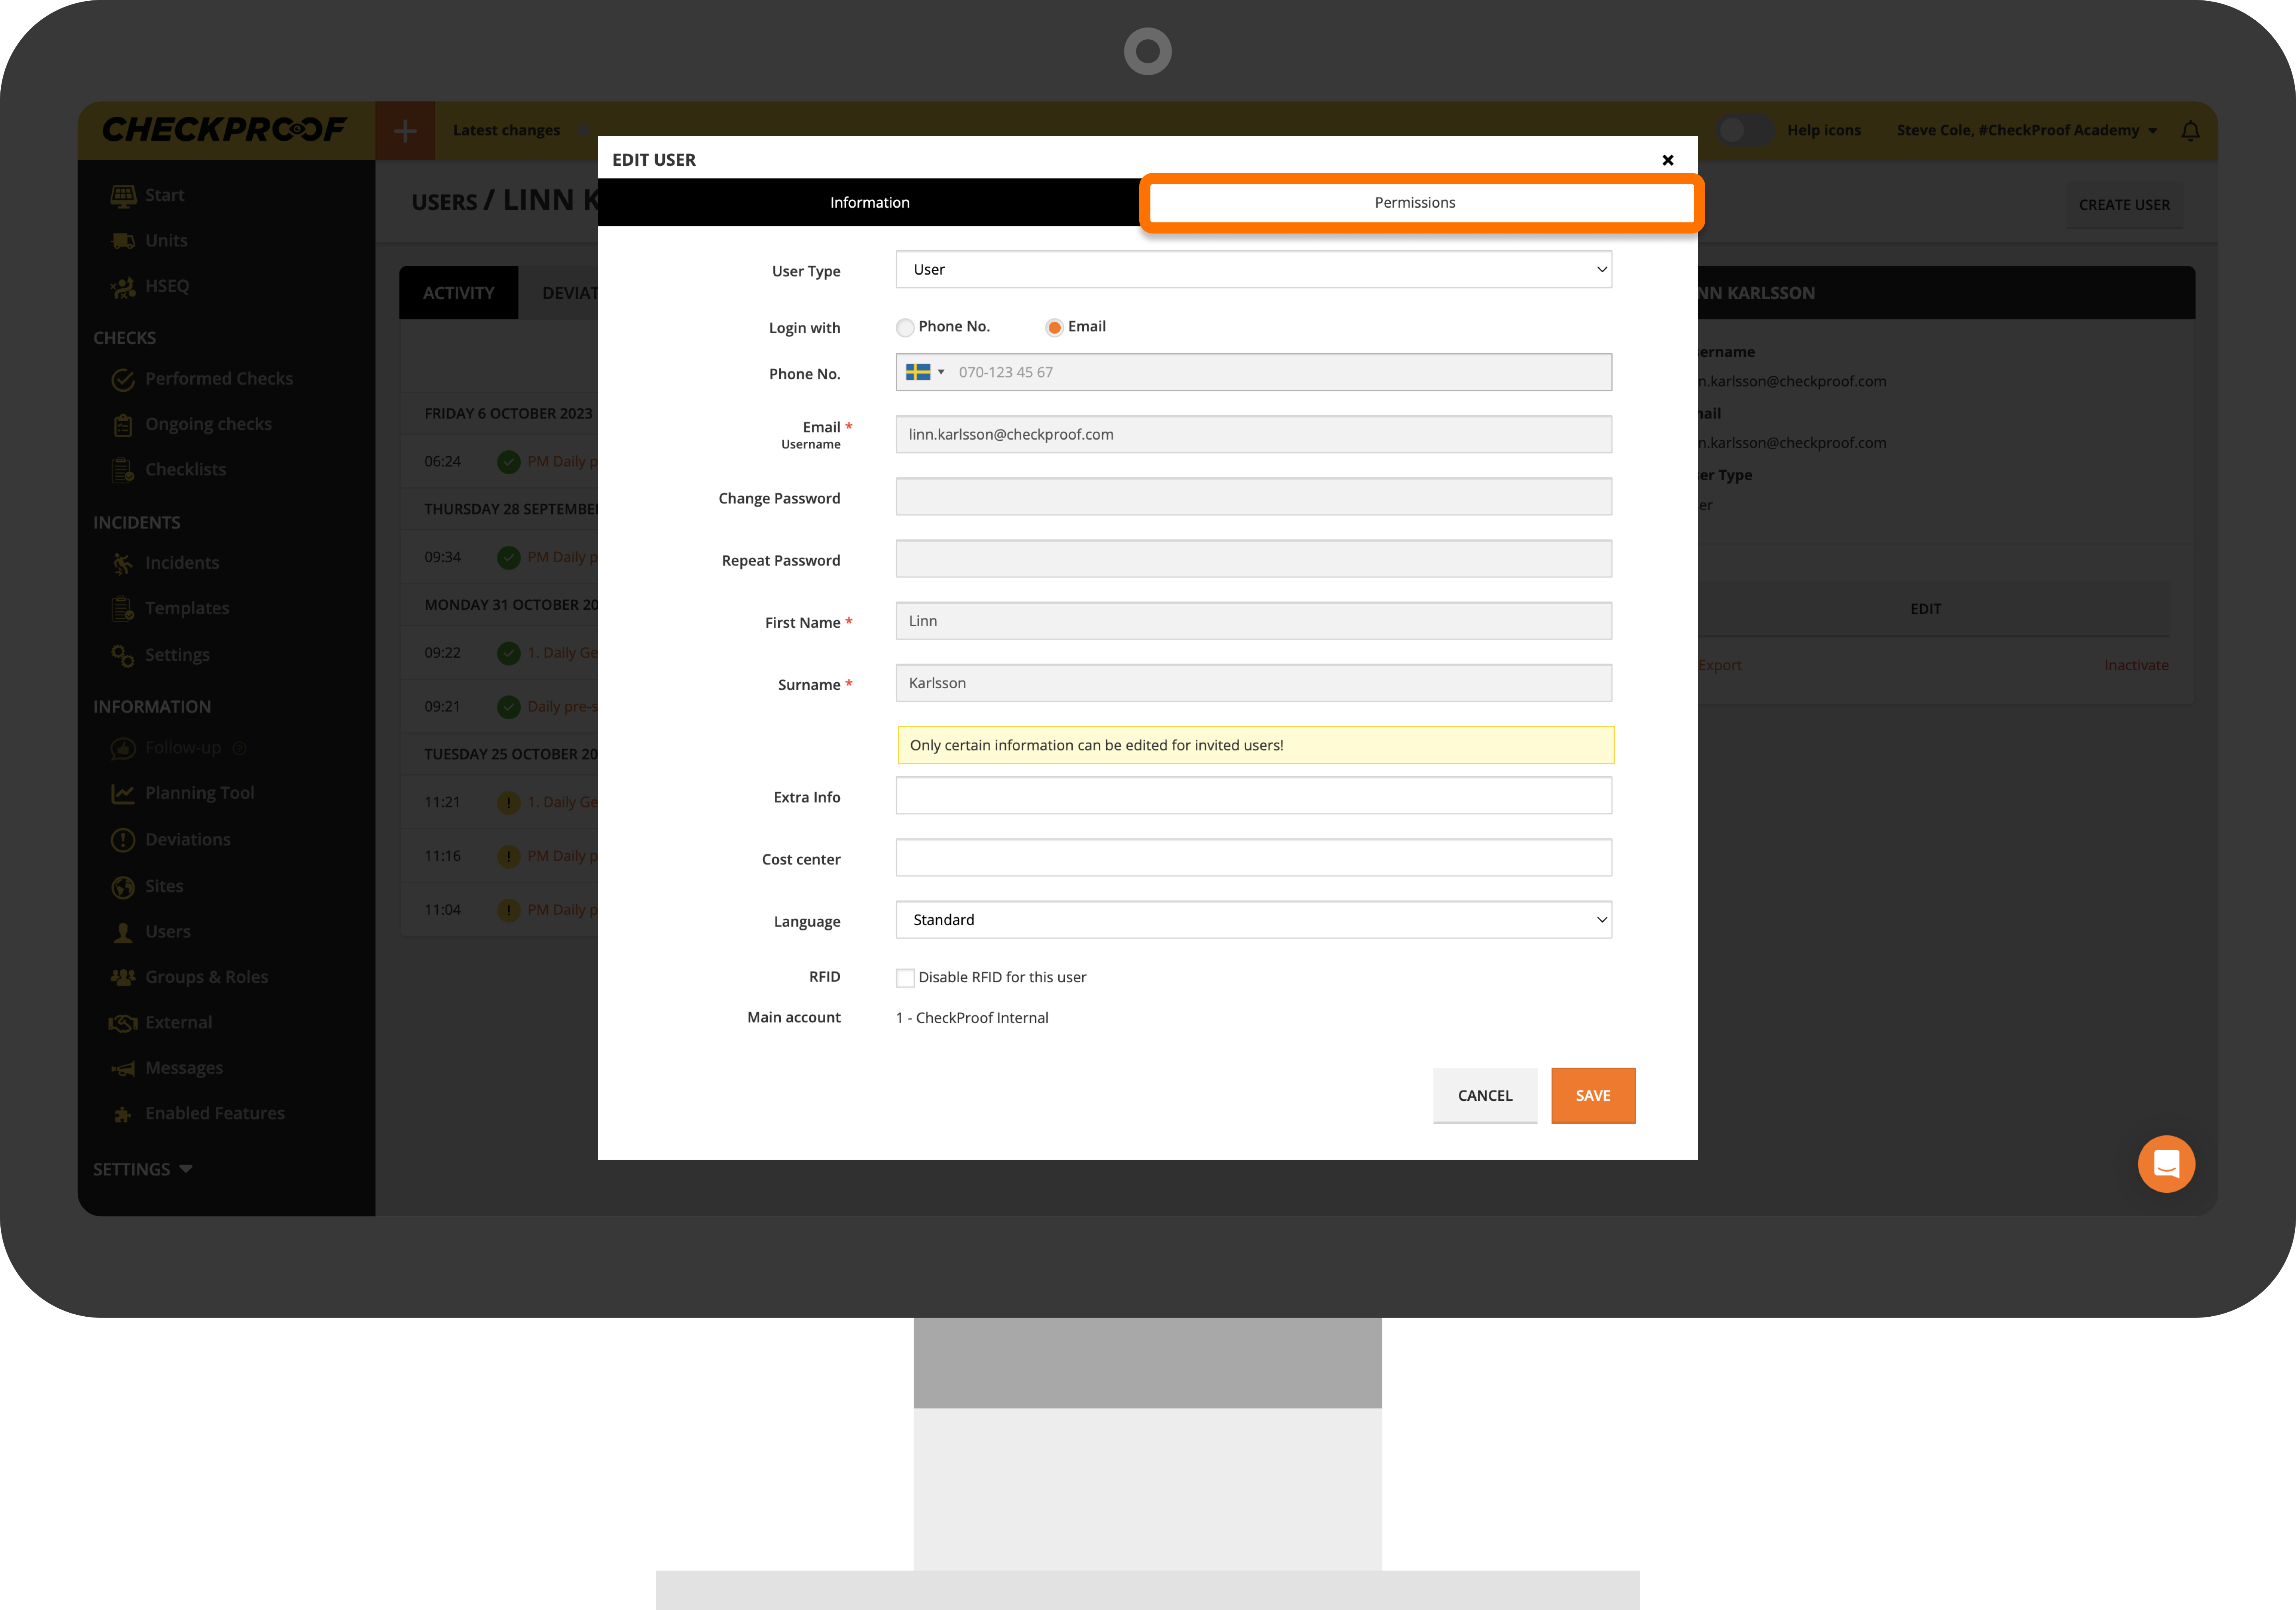
NAVIGATE TO THE PERMISSIONS
Clicking the “Edit” button sends you to the “Edit User” page which allows you to edit the user’s account information. From here, you need to navigate to “Permissions”.
4
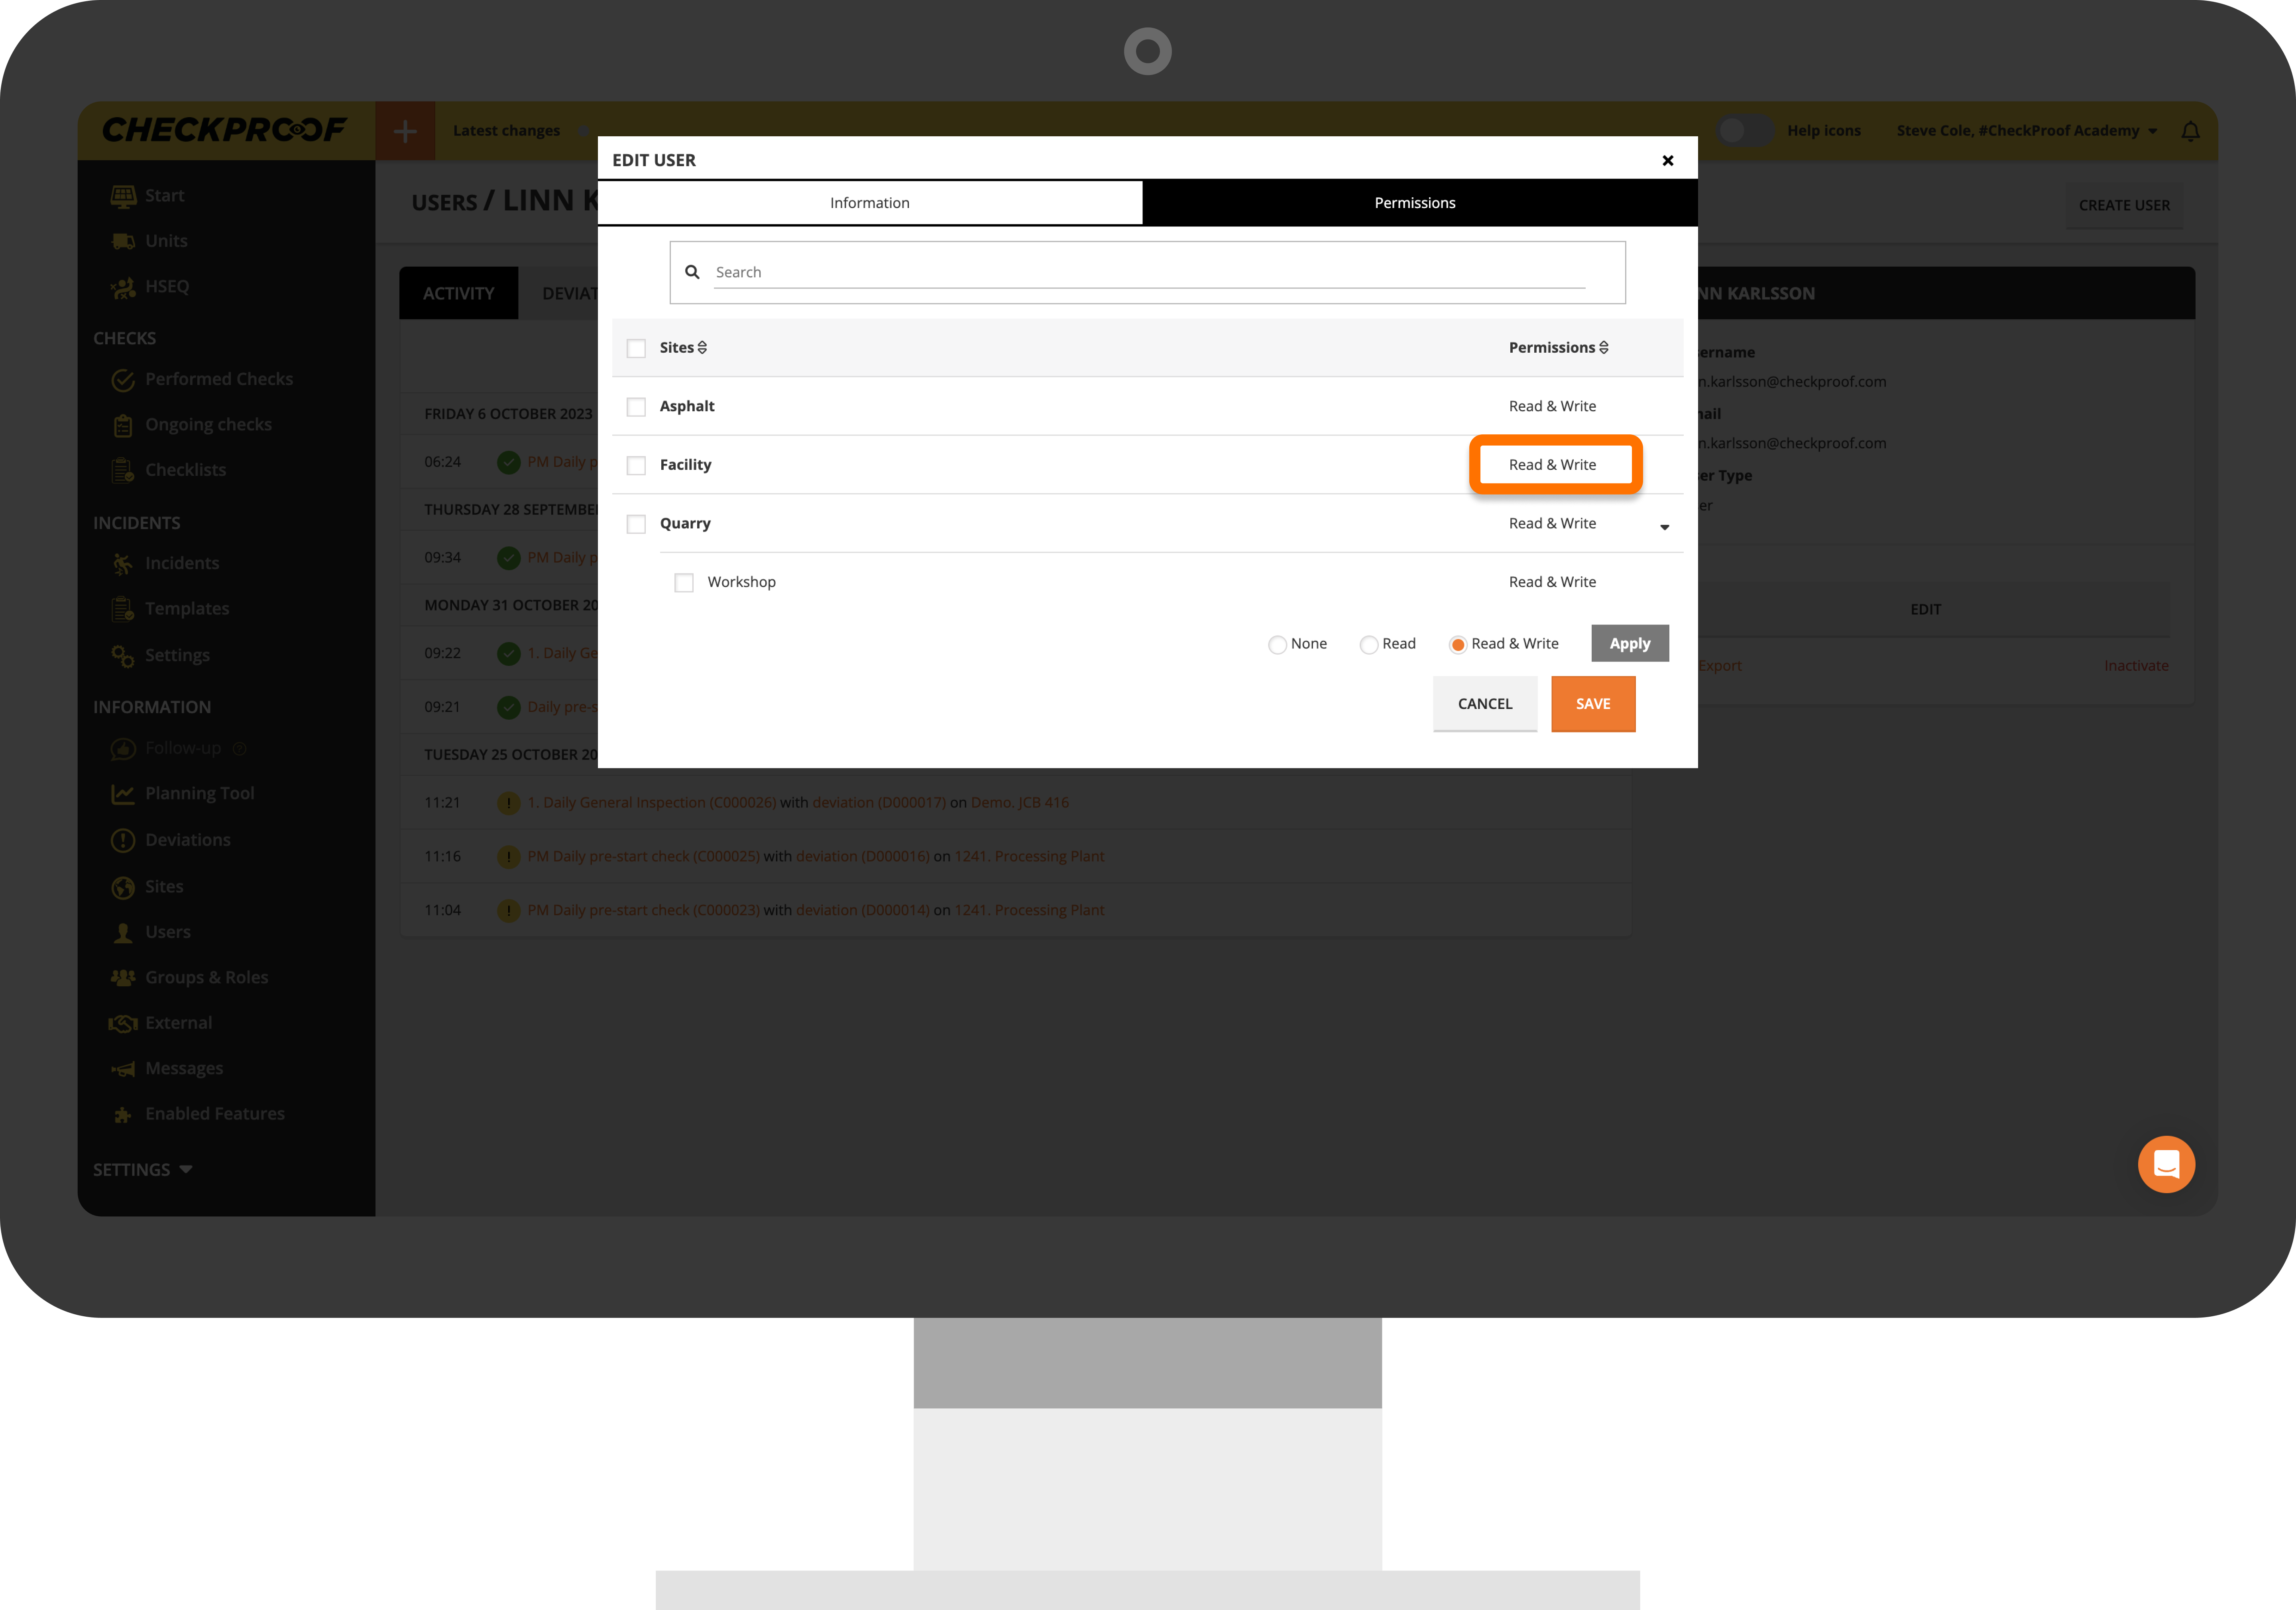
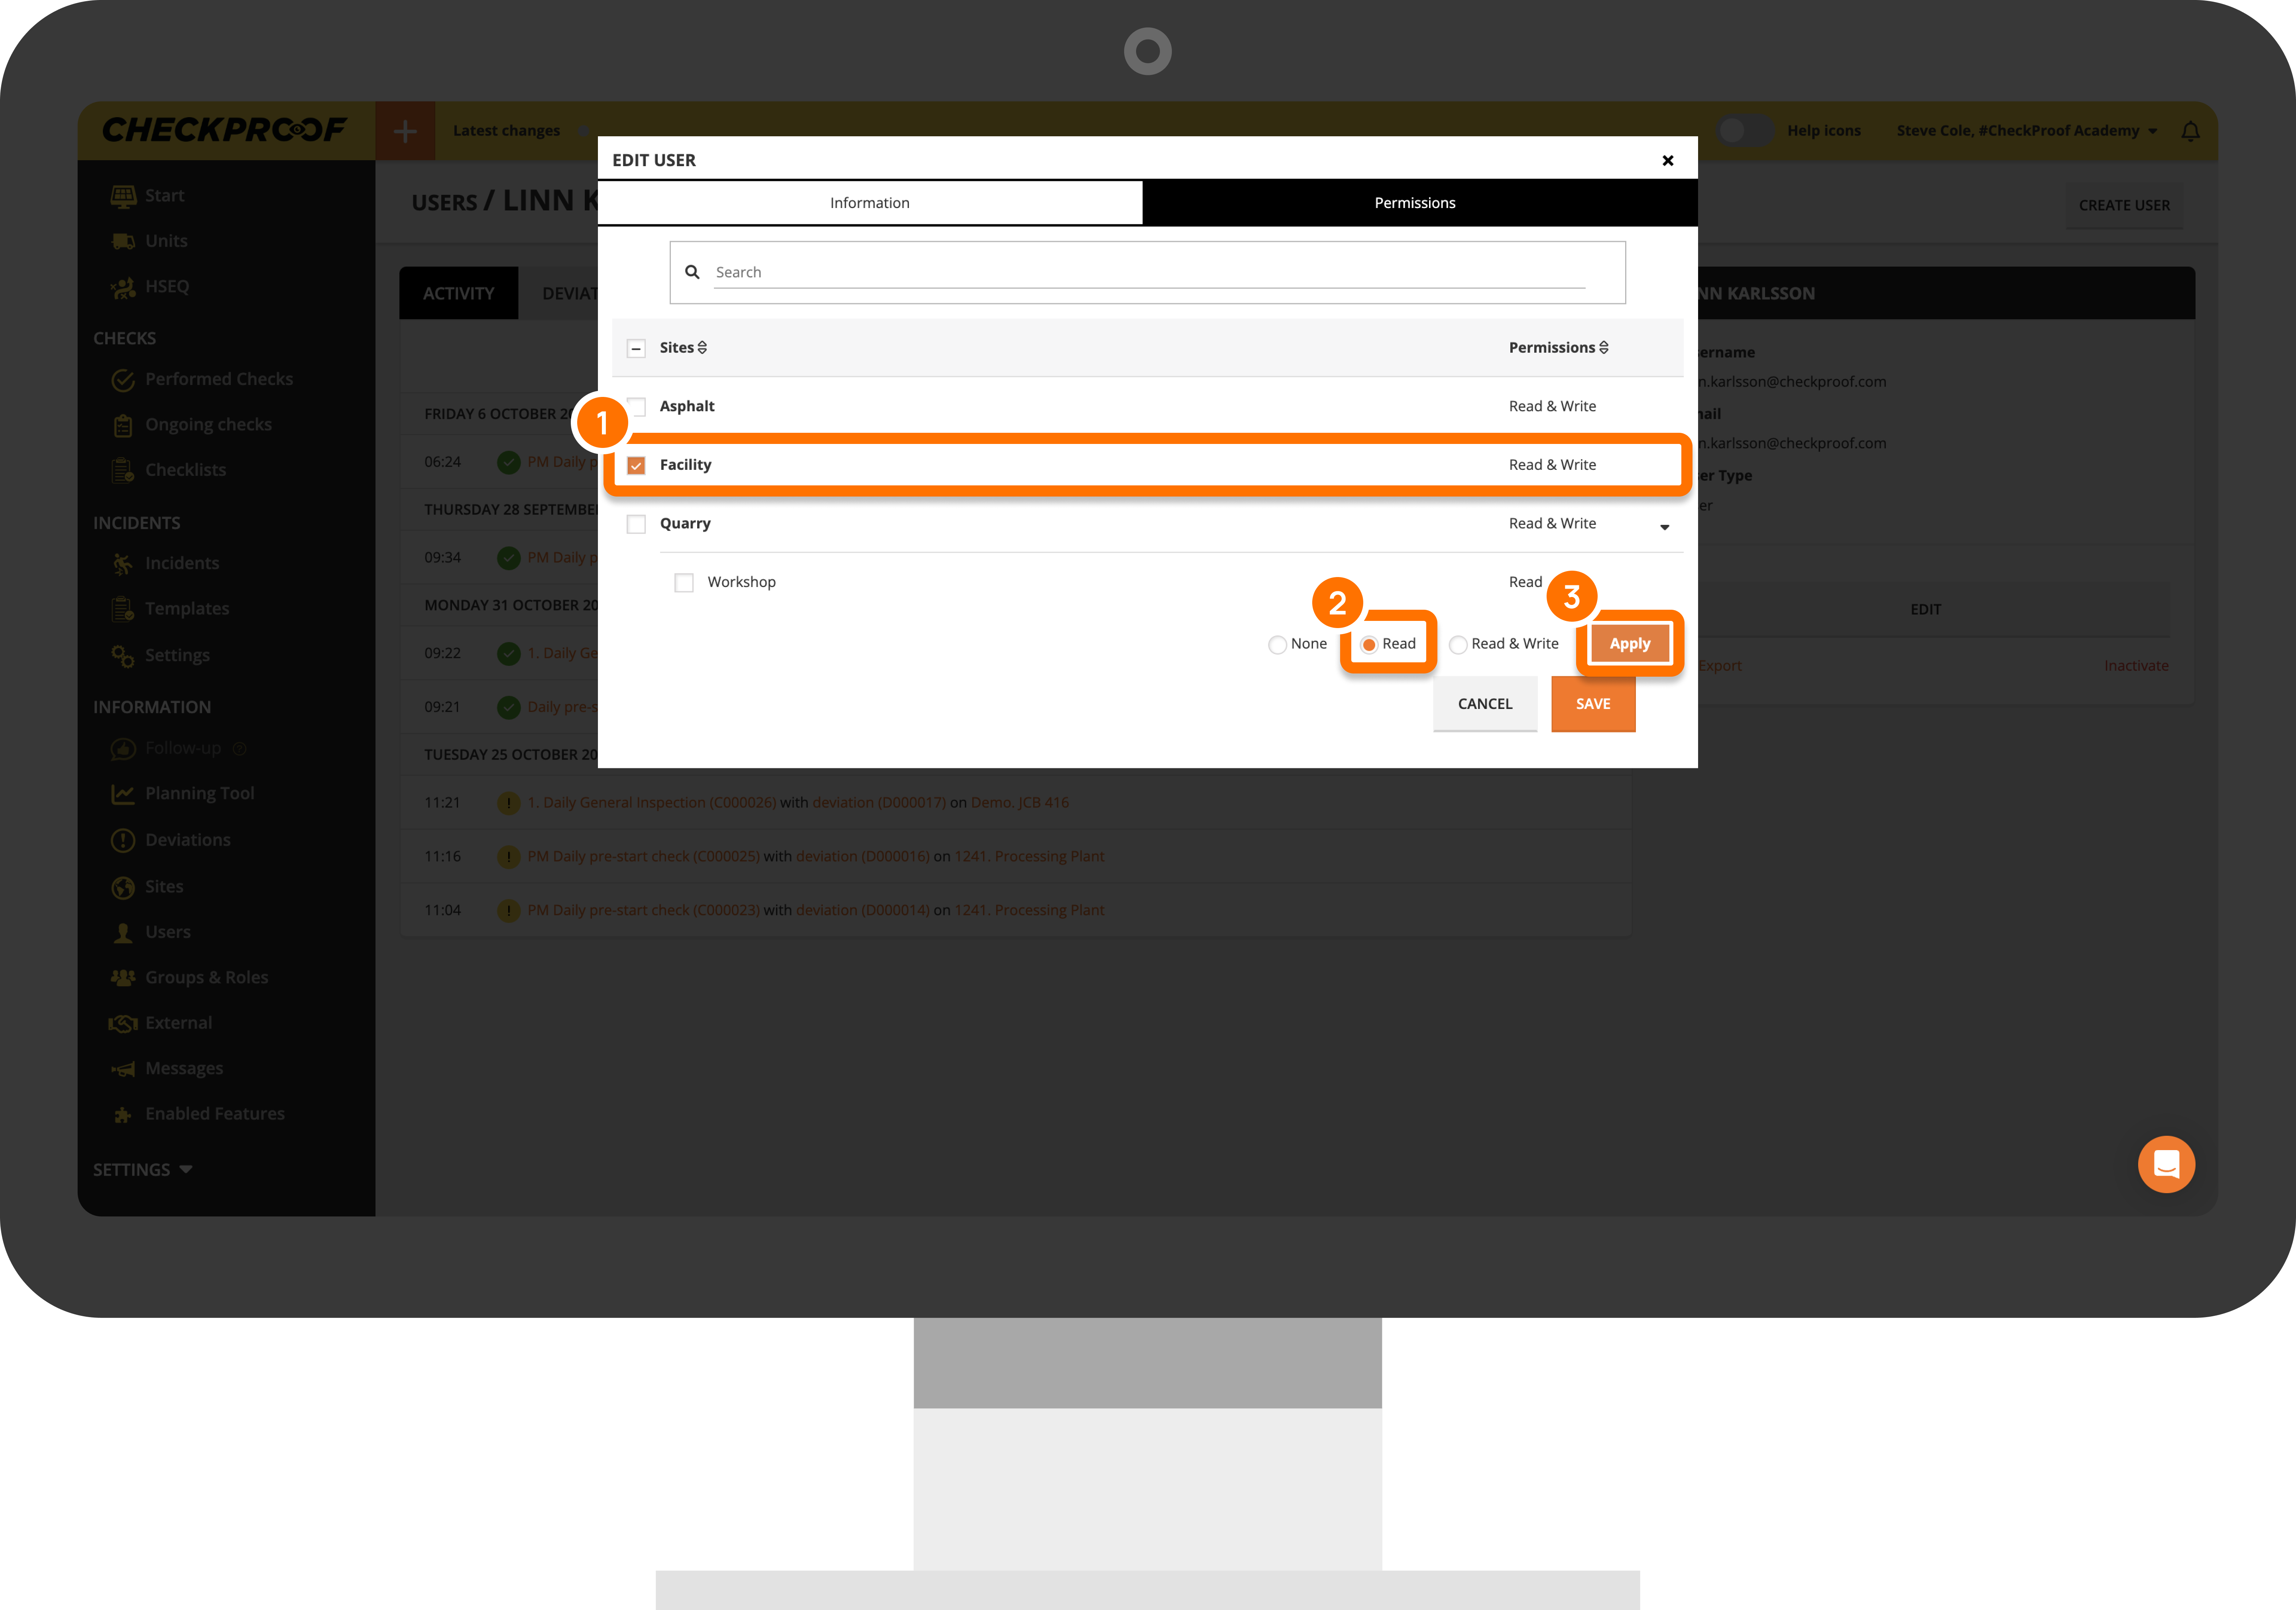
APPLY PERMISSIONS
Now you are able to decide which permissions the user should have by checking the corresponding boxes next to each site. In the example below, the user has “Read” and “Write” permissions for both sites.
5
GIVE SECTION PERMSSIONS
If there is a small arrow icon next to a site, that means this site has sections connected to it. If you click this icon, you can set separate permissions for the section(s).
When you are finished assigning permissions, click the “Save” button to apply the permissions.
6
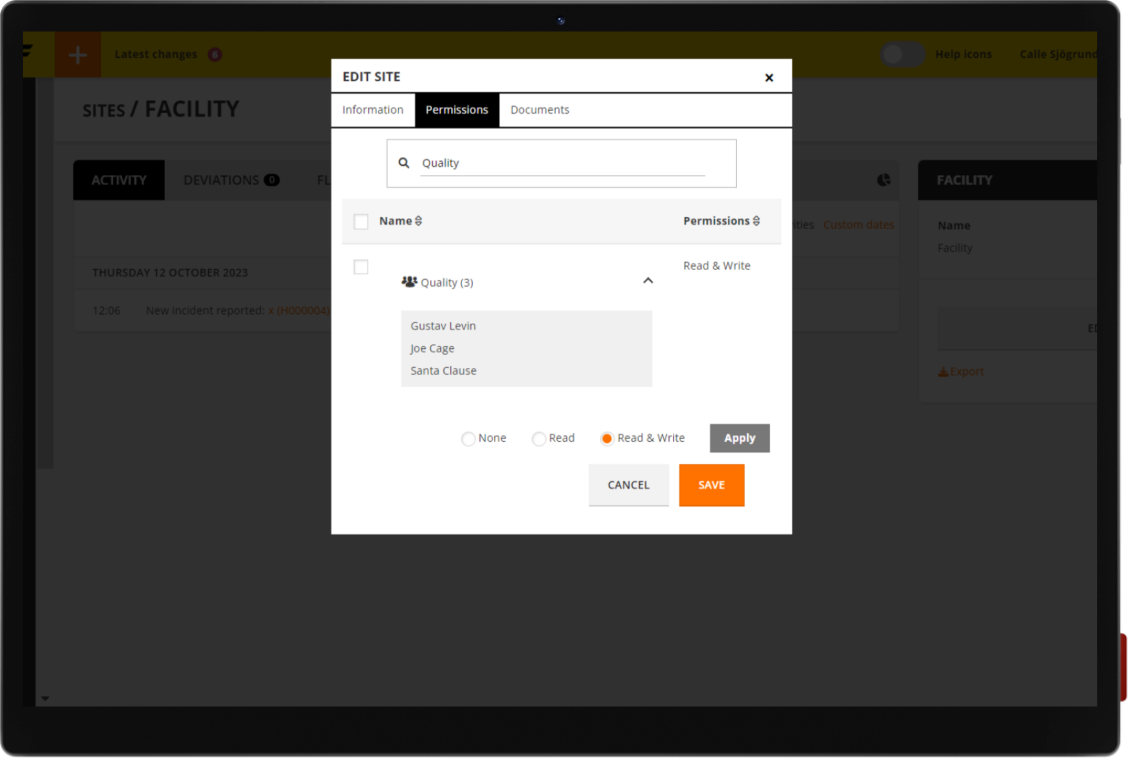
GROUP PERMISSIONS
Thank you for the clarification! Here is the updated translation:
You can also assign group permissions to a site. This works the same way as when you assign permissions to a user for a site.
Instead of manually changing permissions for each individual user in the group, you can assign the permissions to the entire group. The users within the group will then automatically receive these permissions.
This group will now have access to the workplace.
Great! Now you know how to assign permissions to existing users.