
Connecting a Tag
Using tags is a very efficient way to save time as they autocomplete information that you would otherwise need to complete manually.
Let’s see how to connect a tag.
1
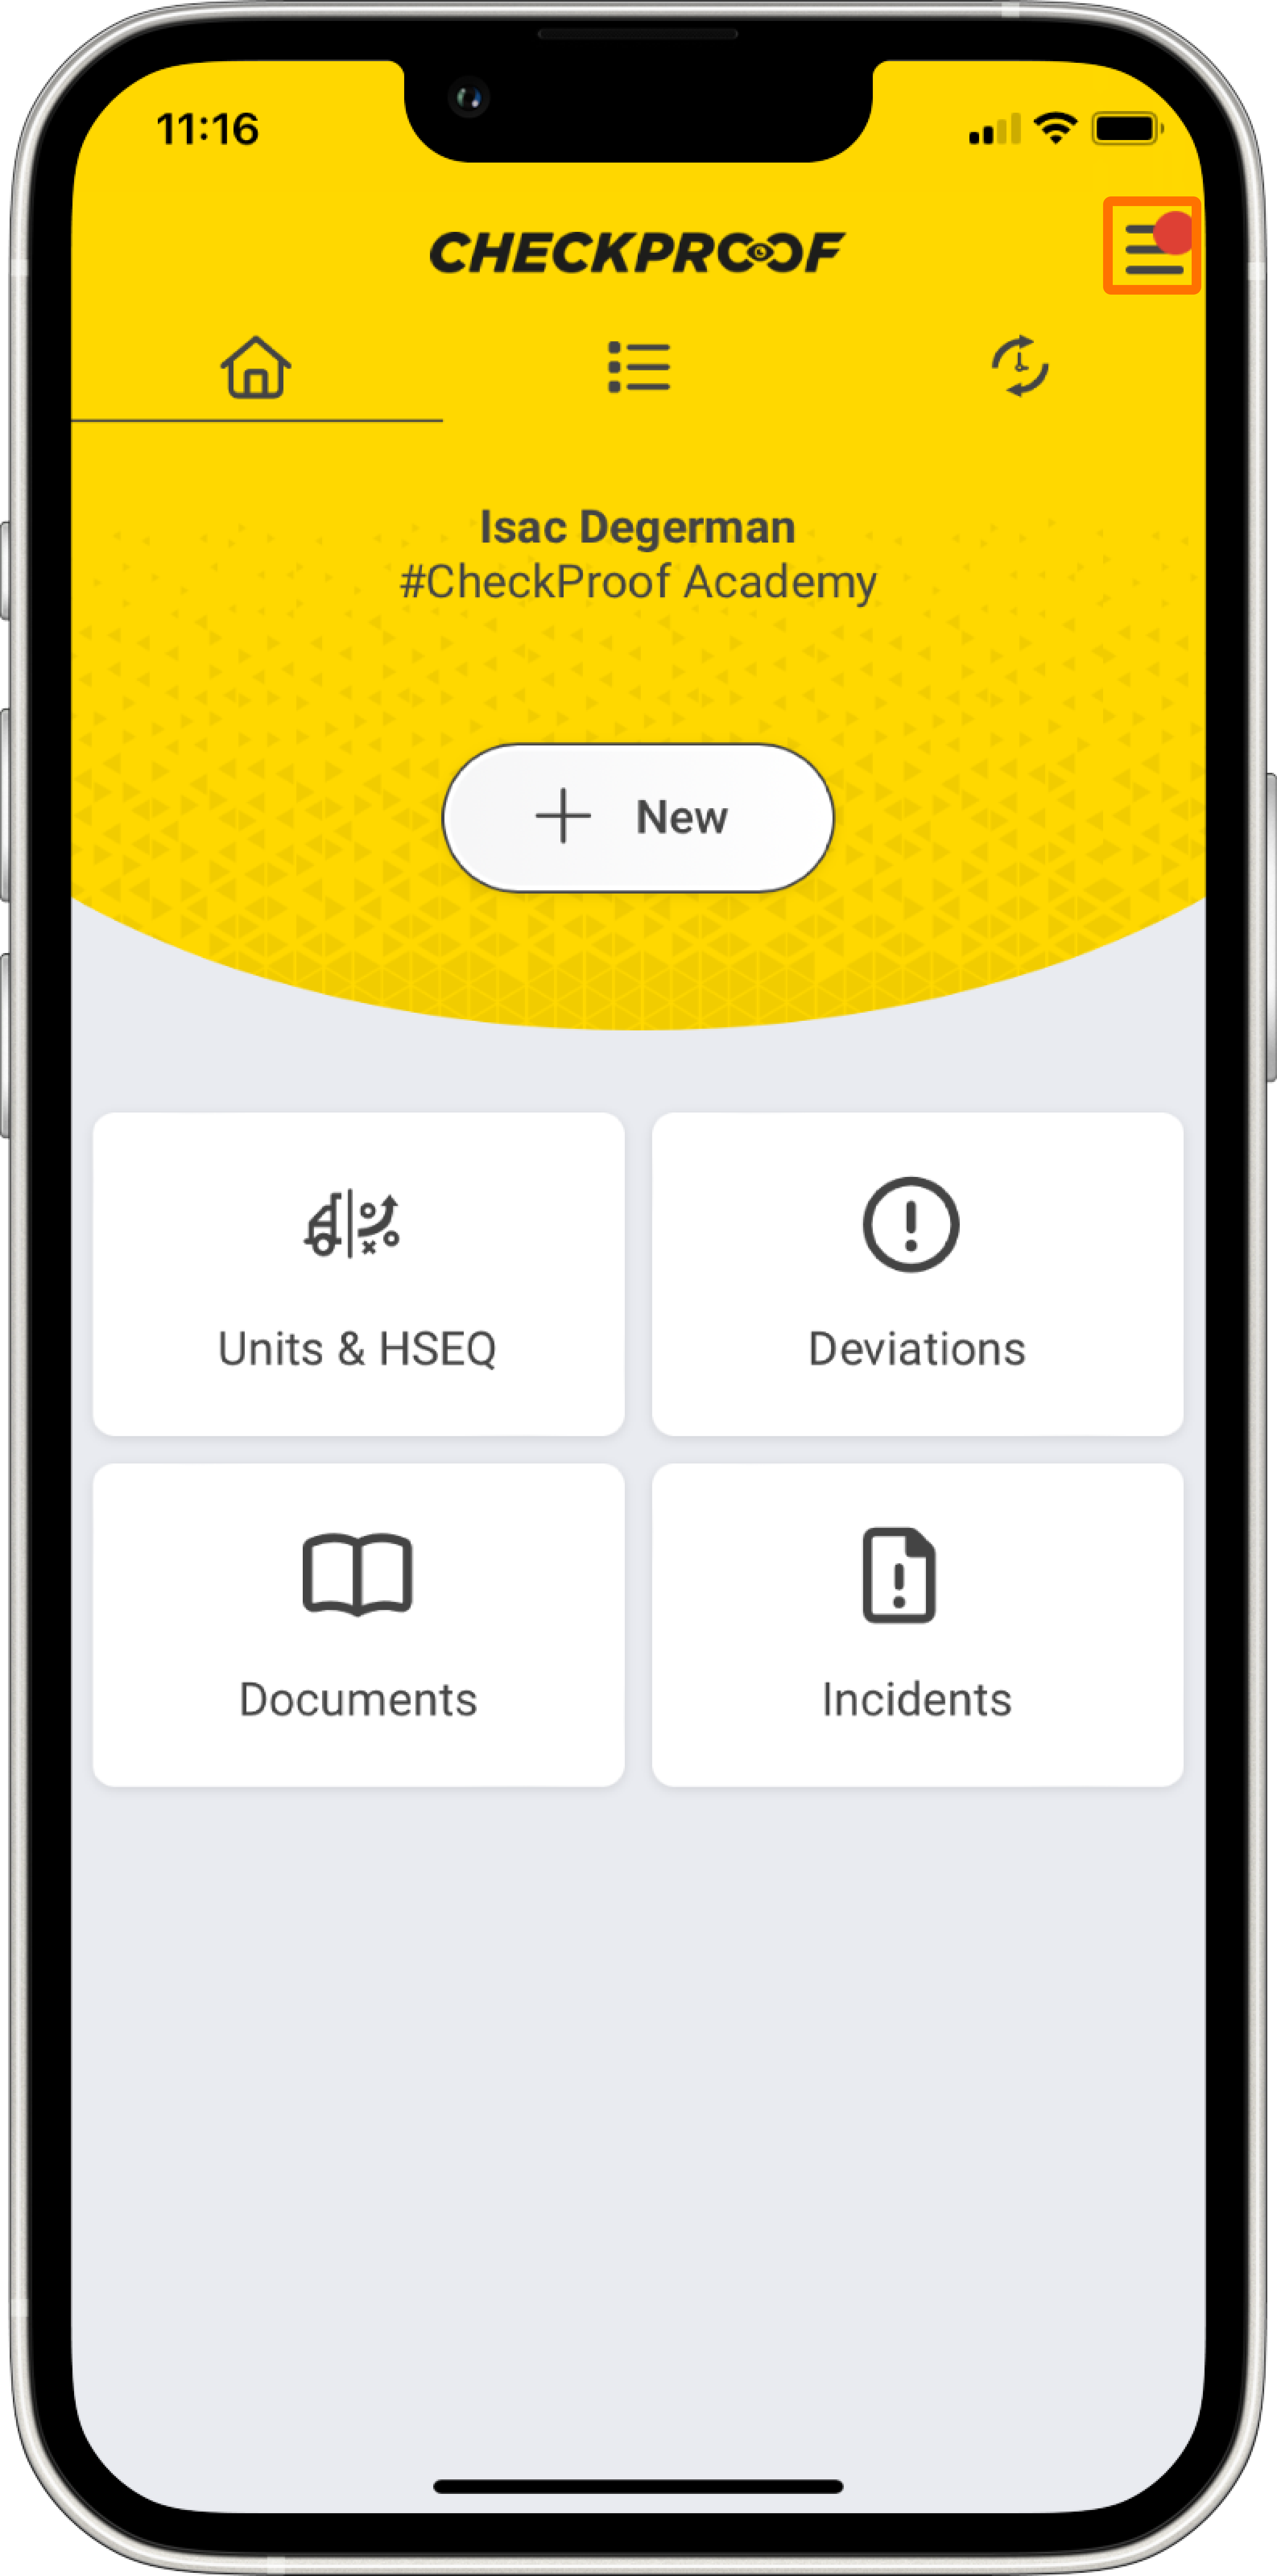
ACCESS THE MAIN MENU
First, you should click the menu icon to access the main menu.
2
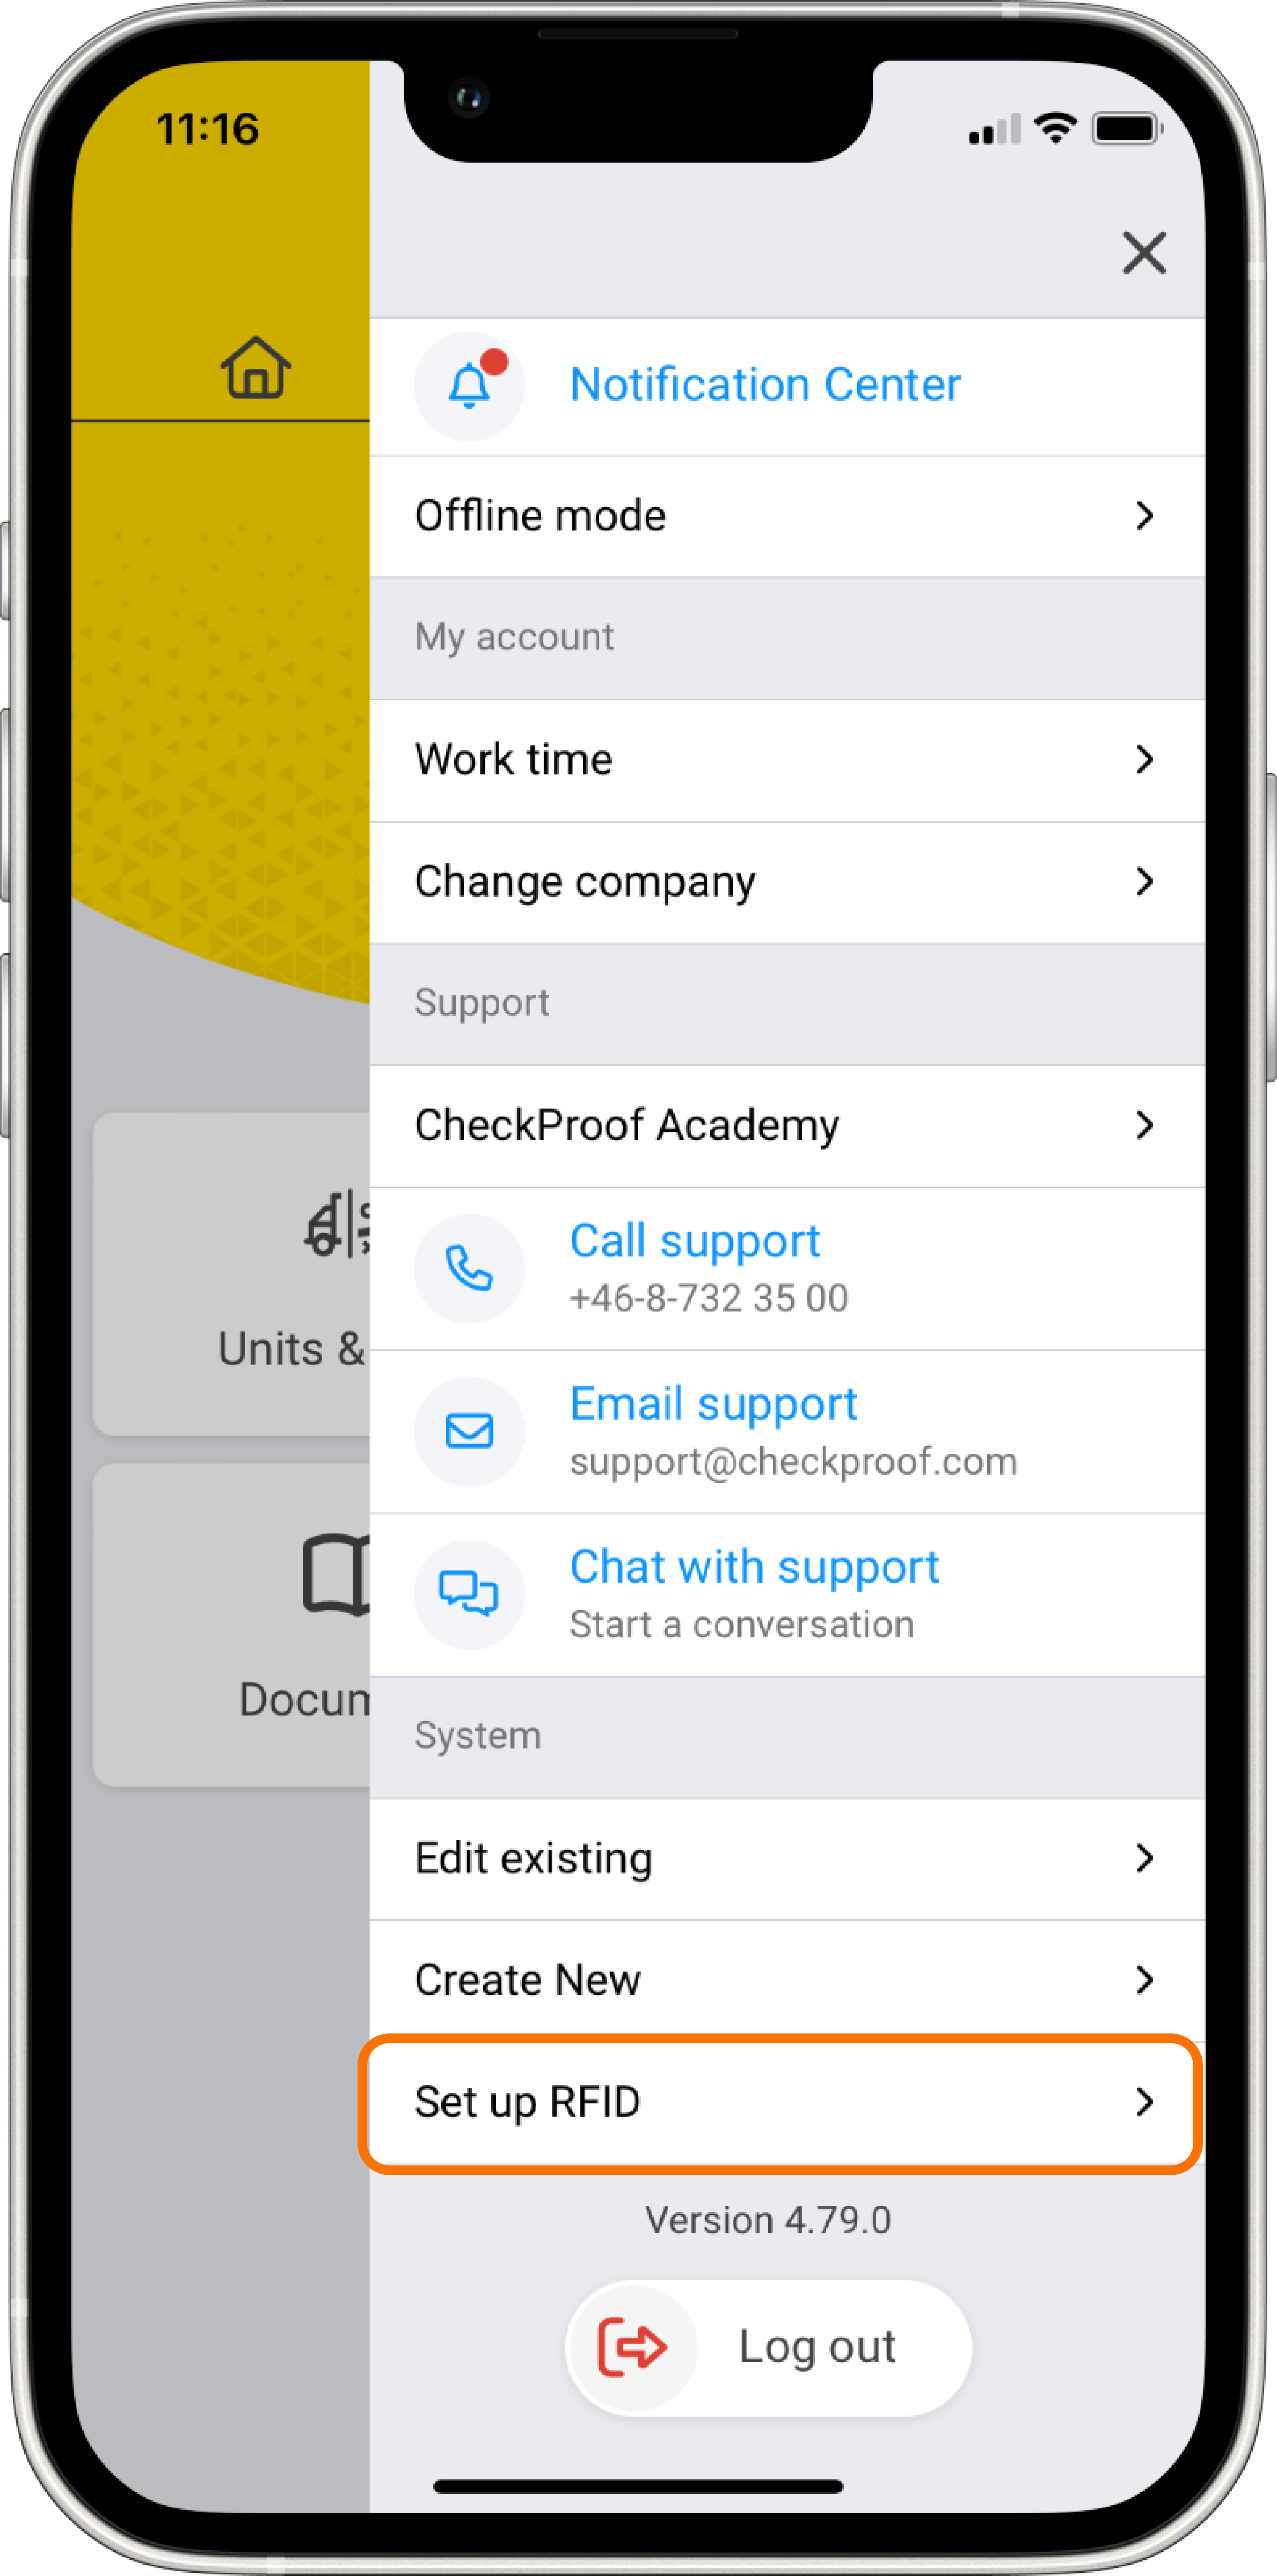
SET UP RFID
From the main menu, click on the “Set up RFID” button.
3
COMPLETE THE INFORMATION
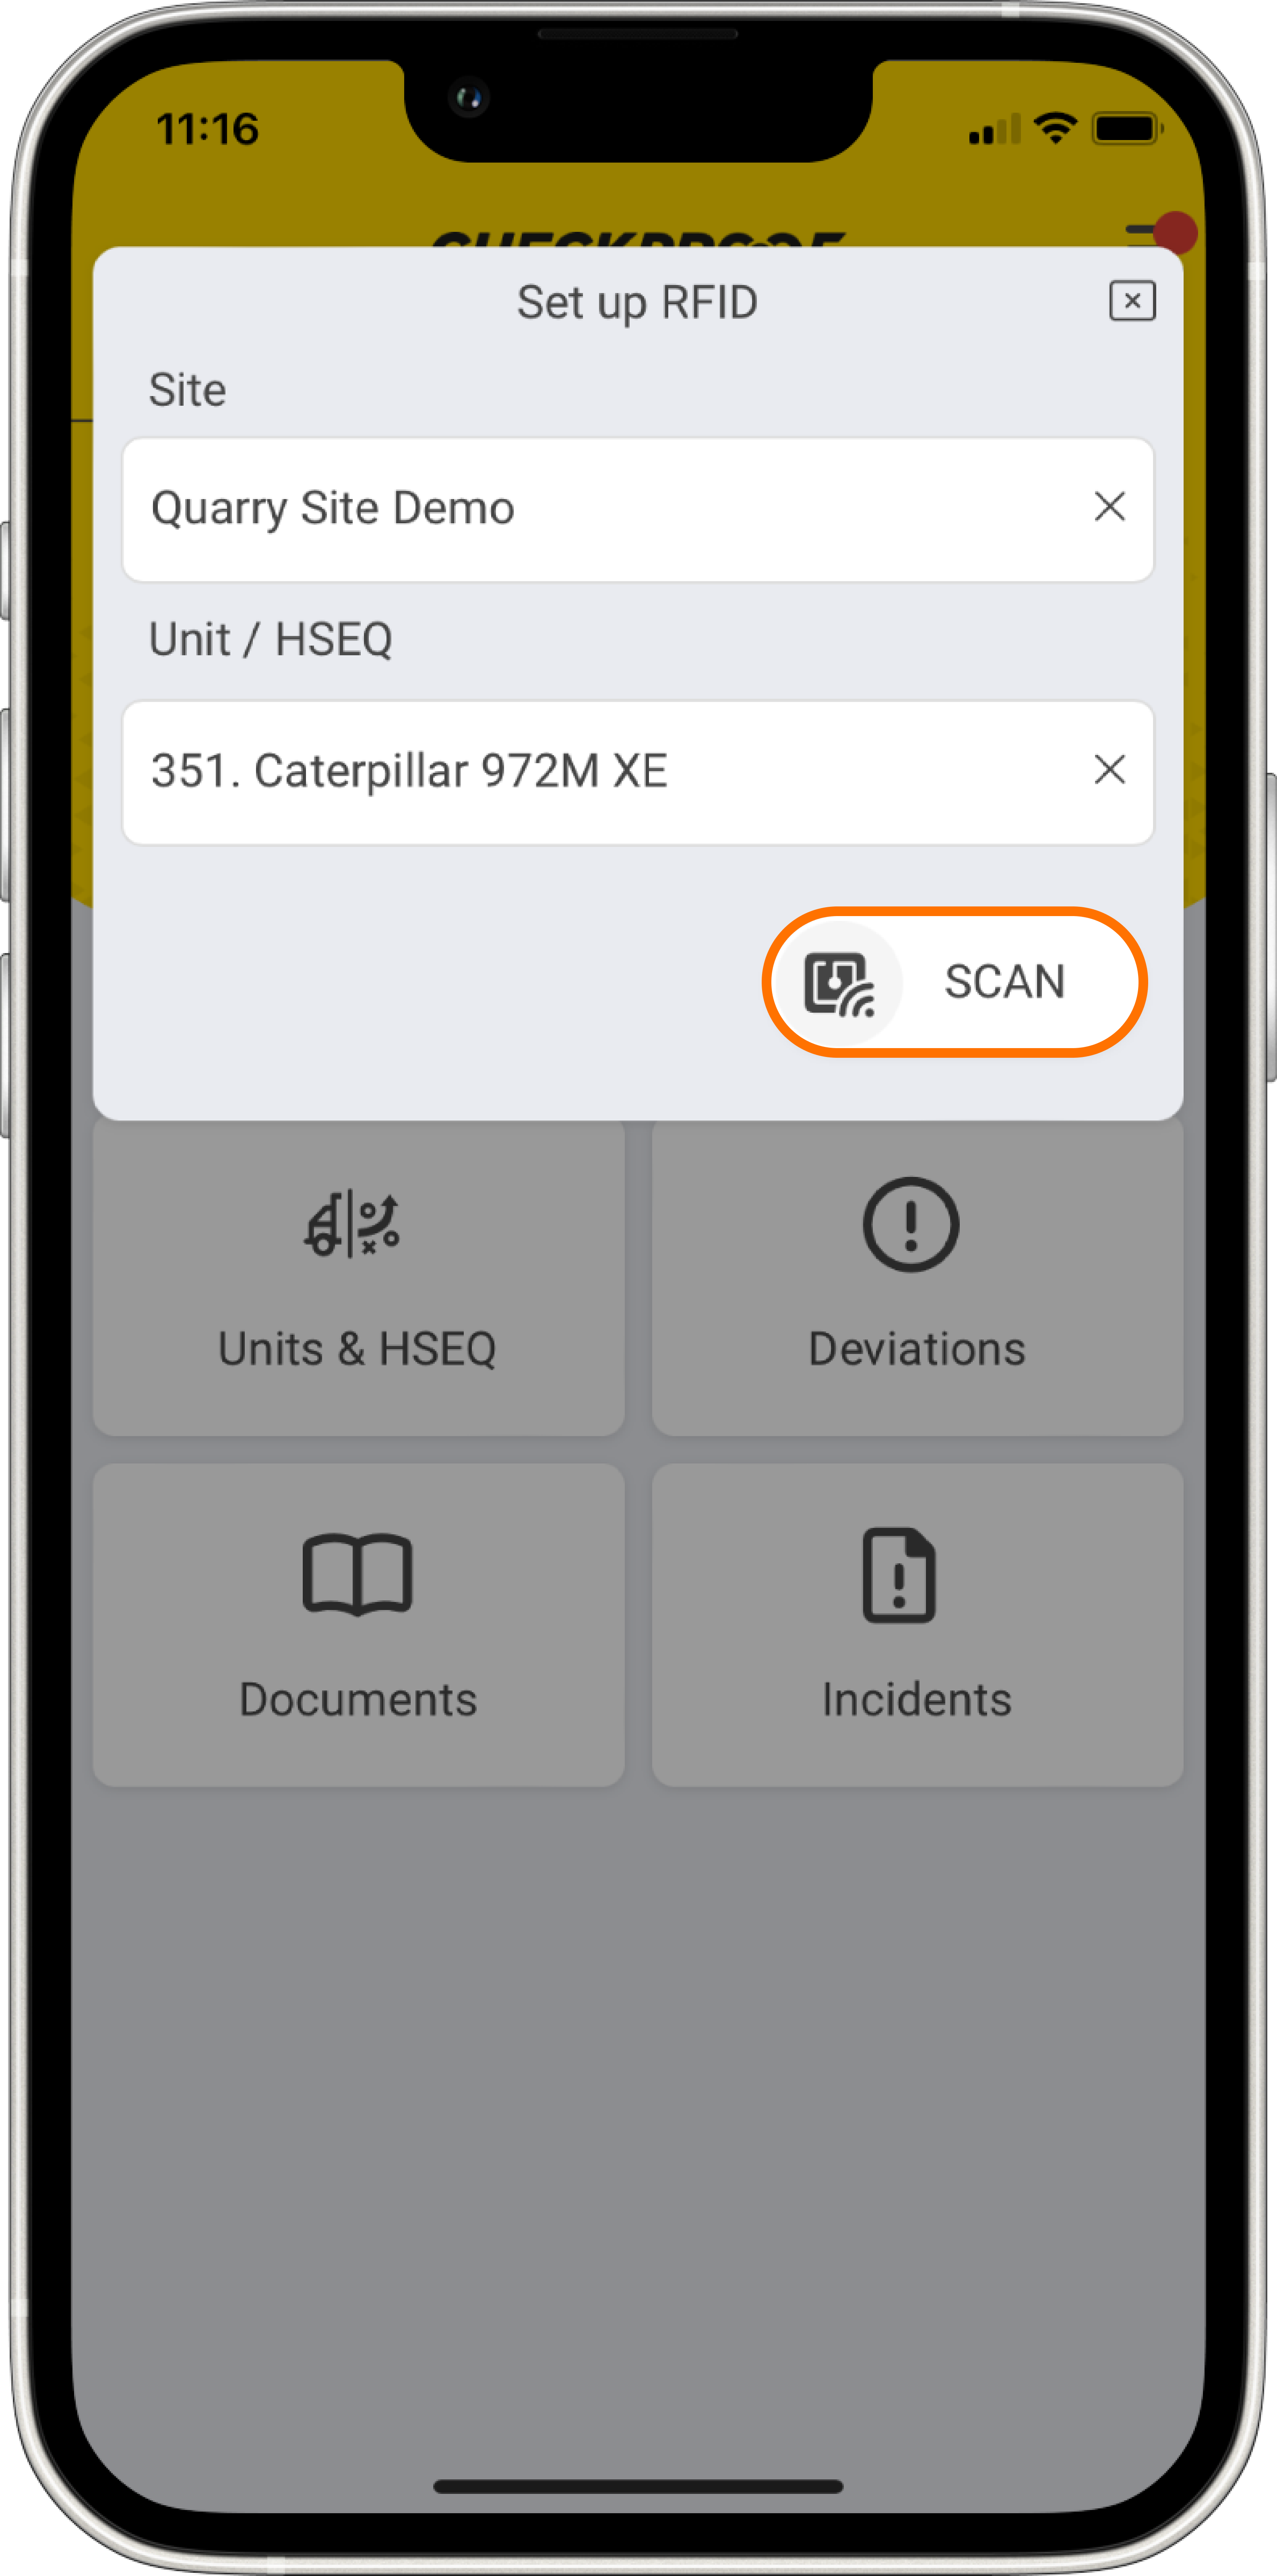
You will now be prompted to complete the missing information. Follow these steps to fill it in:
- Select the “Site” where you are adding the tag.
- Once you have chosen the site, you will be prompted to select a “Section” to pinpoint the area.
- Now choose the “Unit” (the machine that you are tagging).
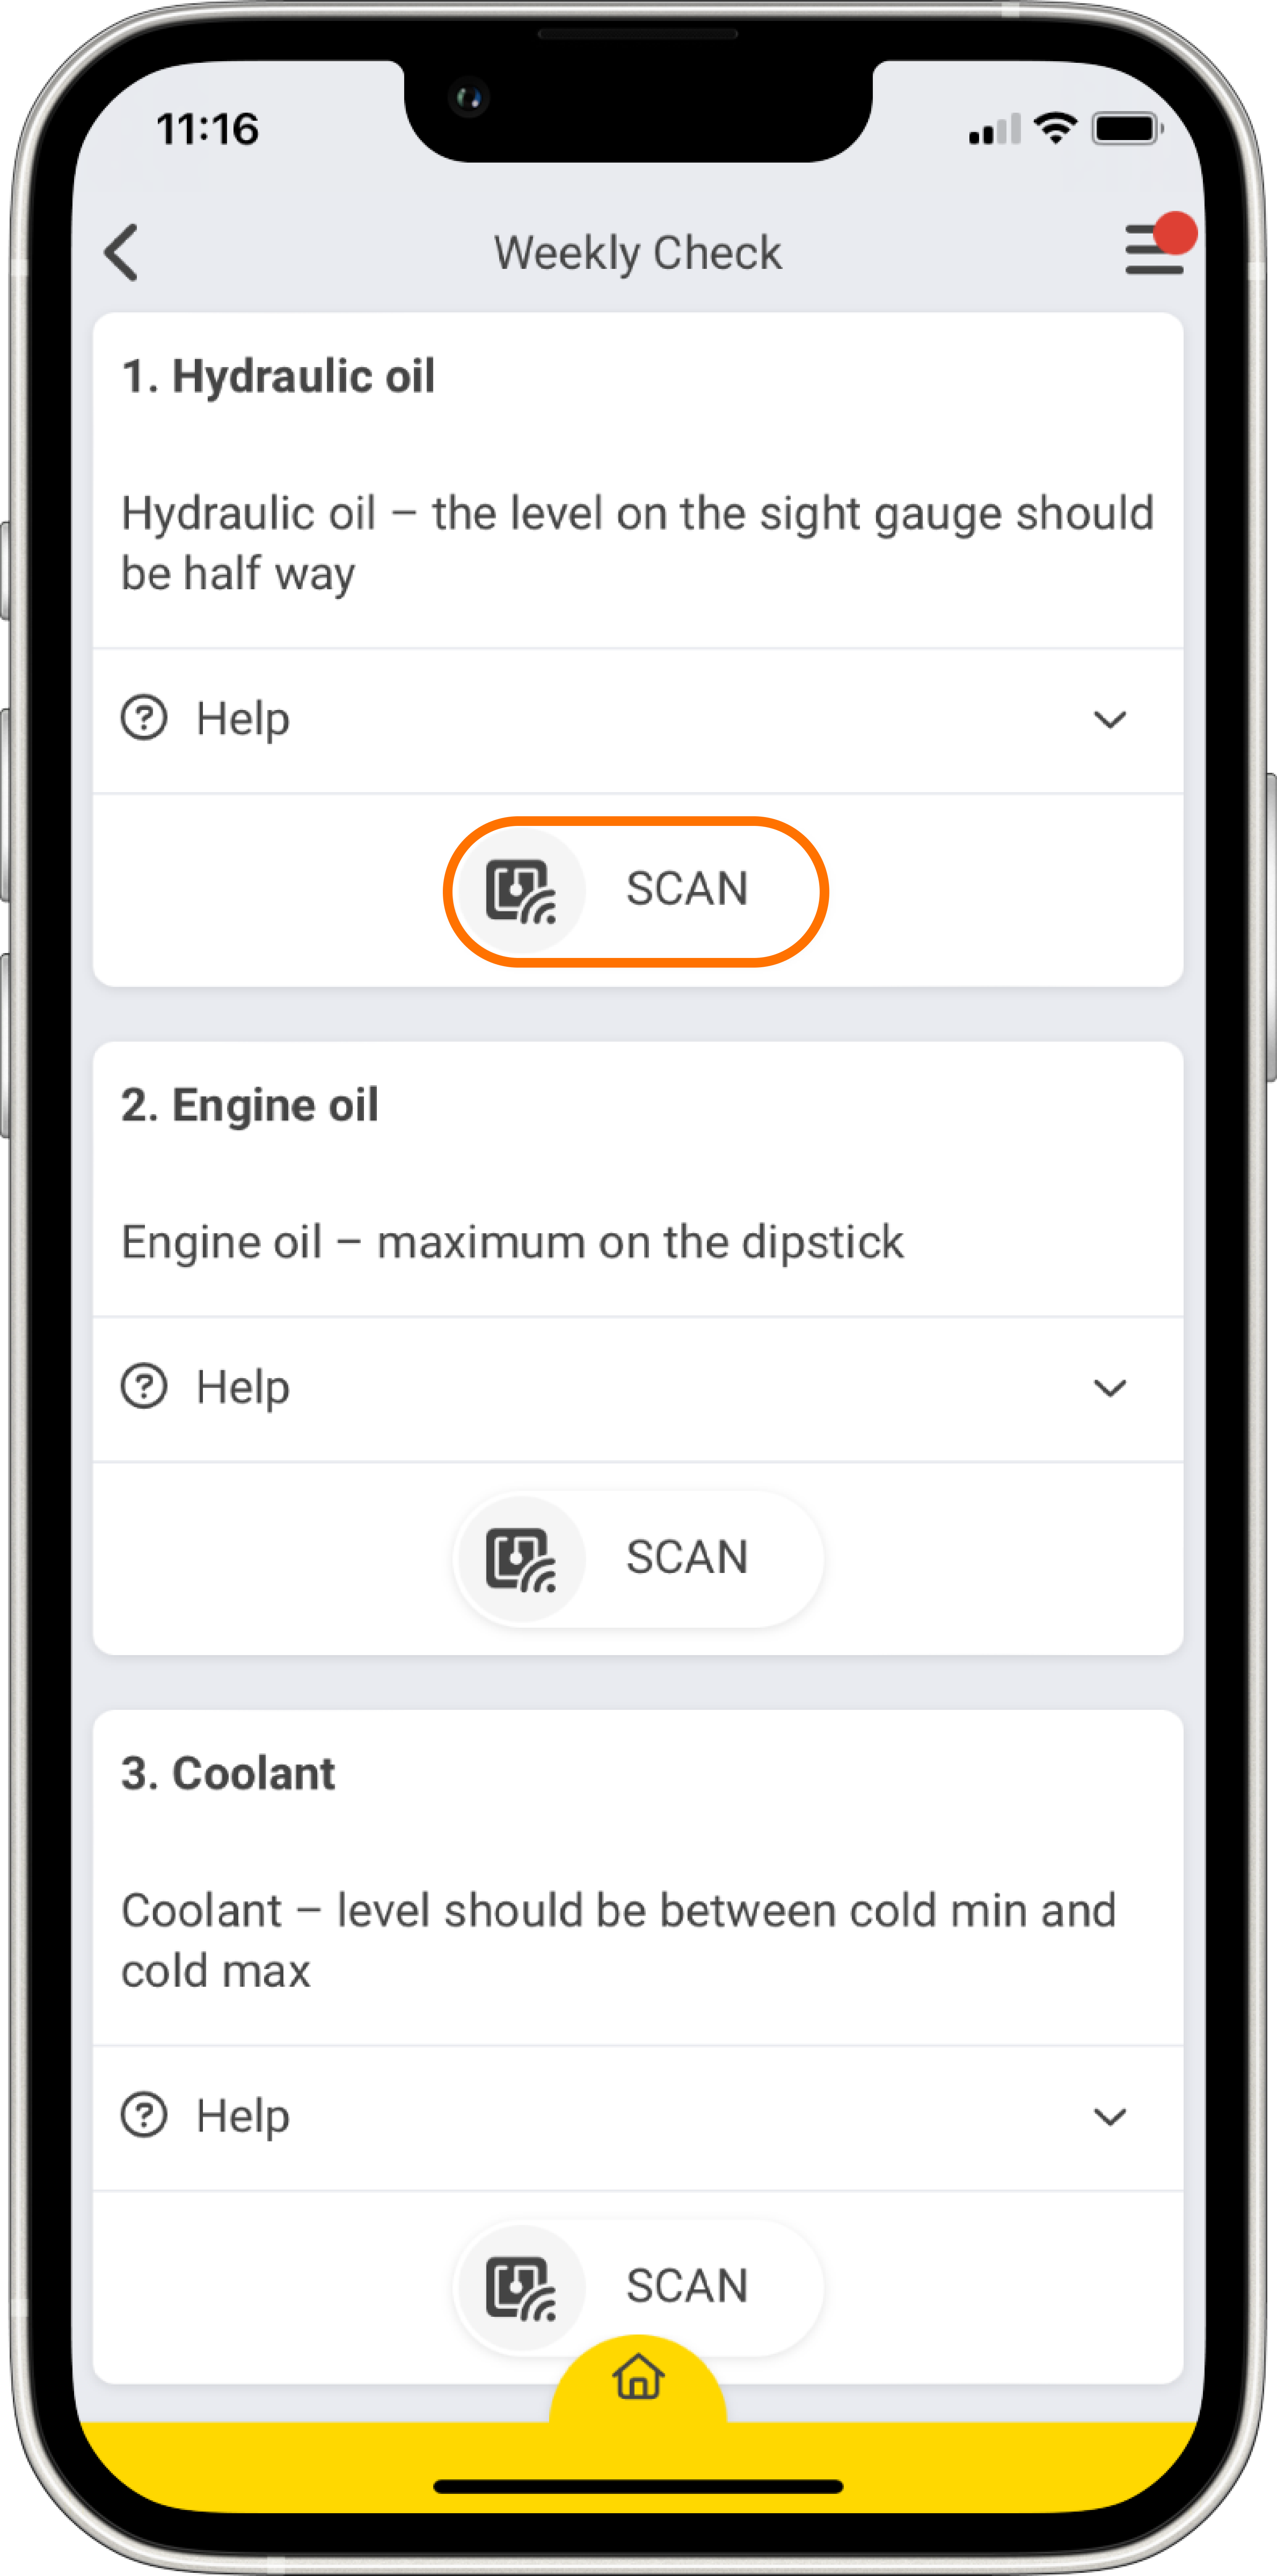
- When you are done, click on “Scan”.
- Now hold your mobile near the NFC tag to scan it..
4
LINK THE RFID TAG
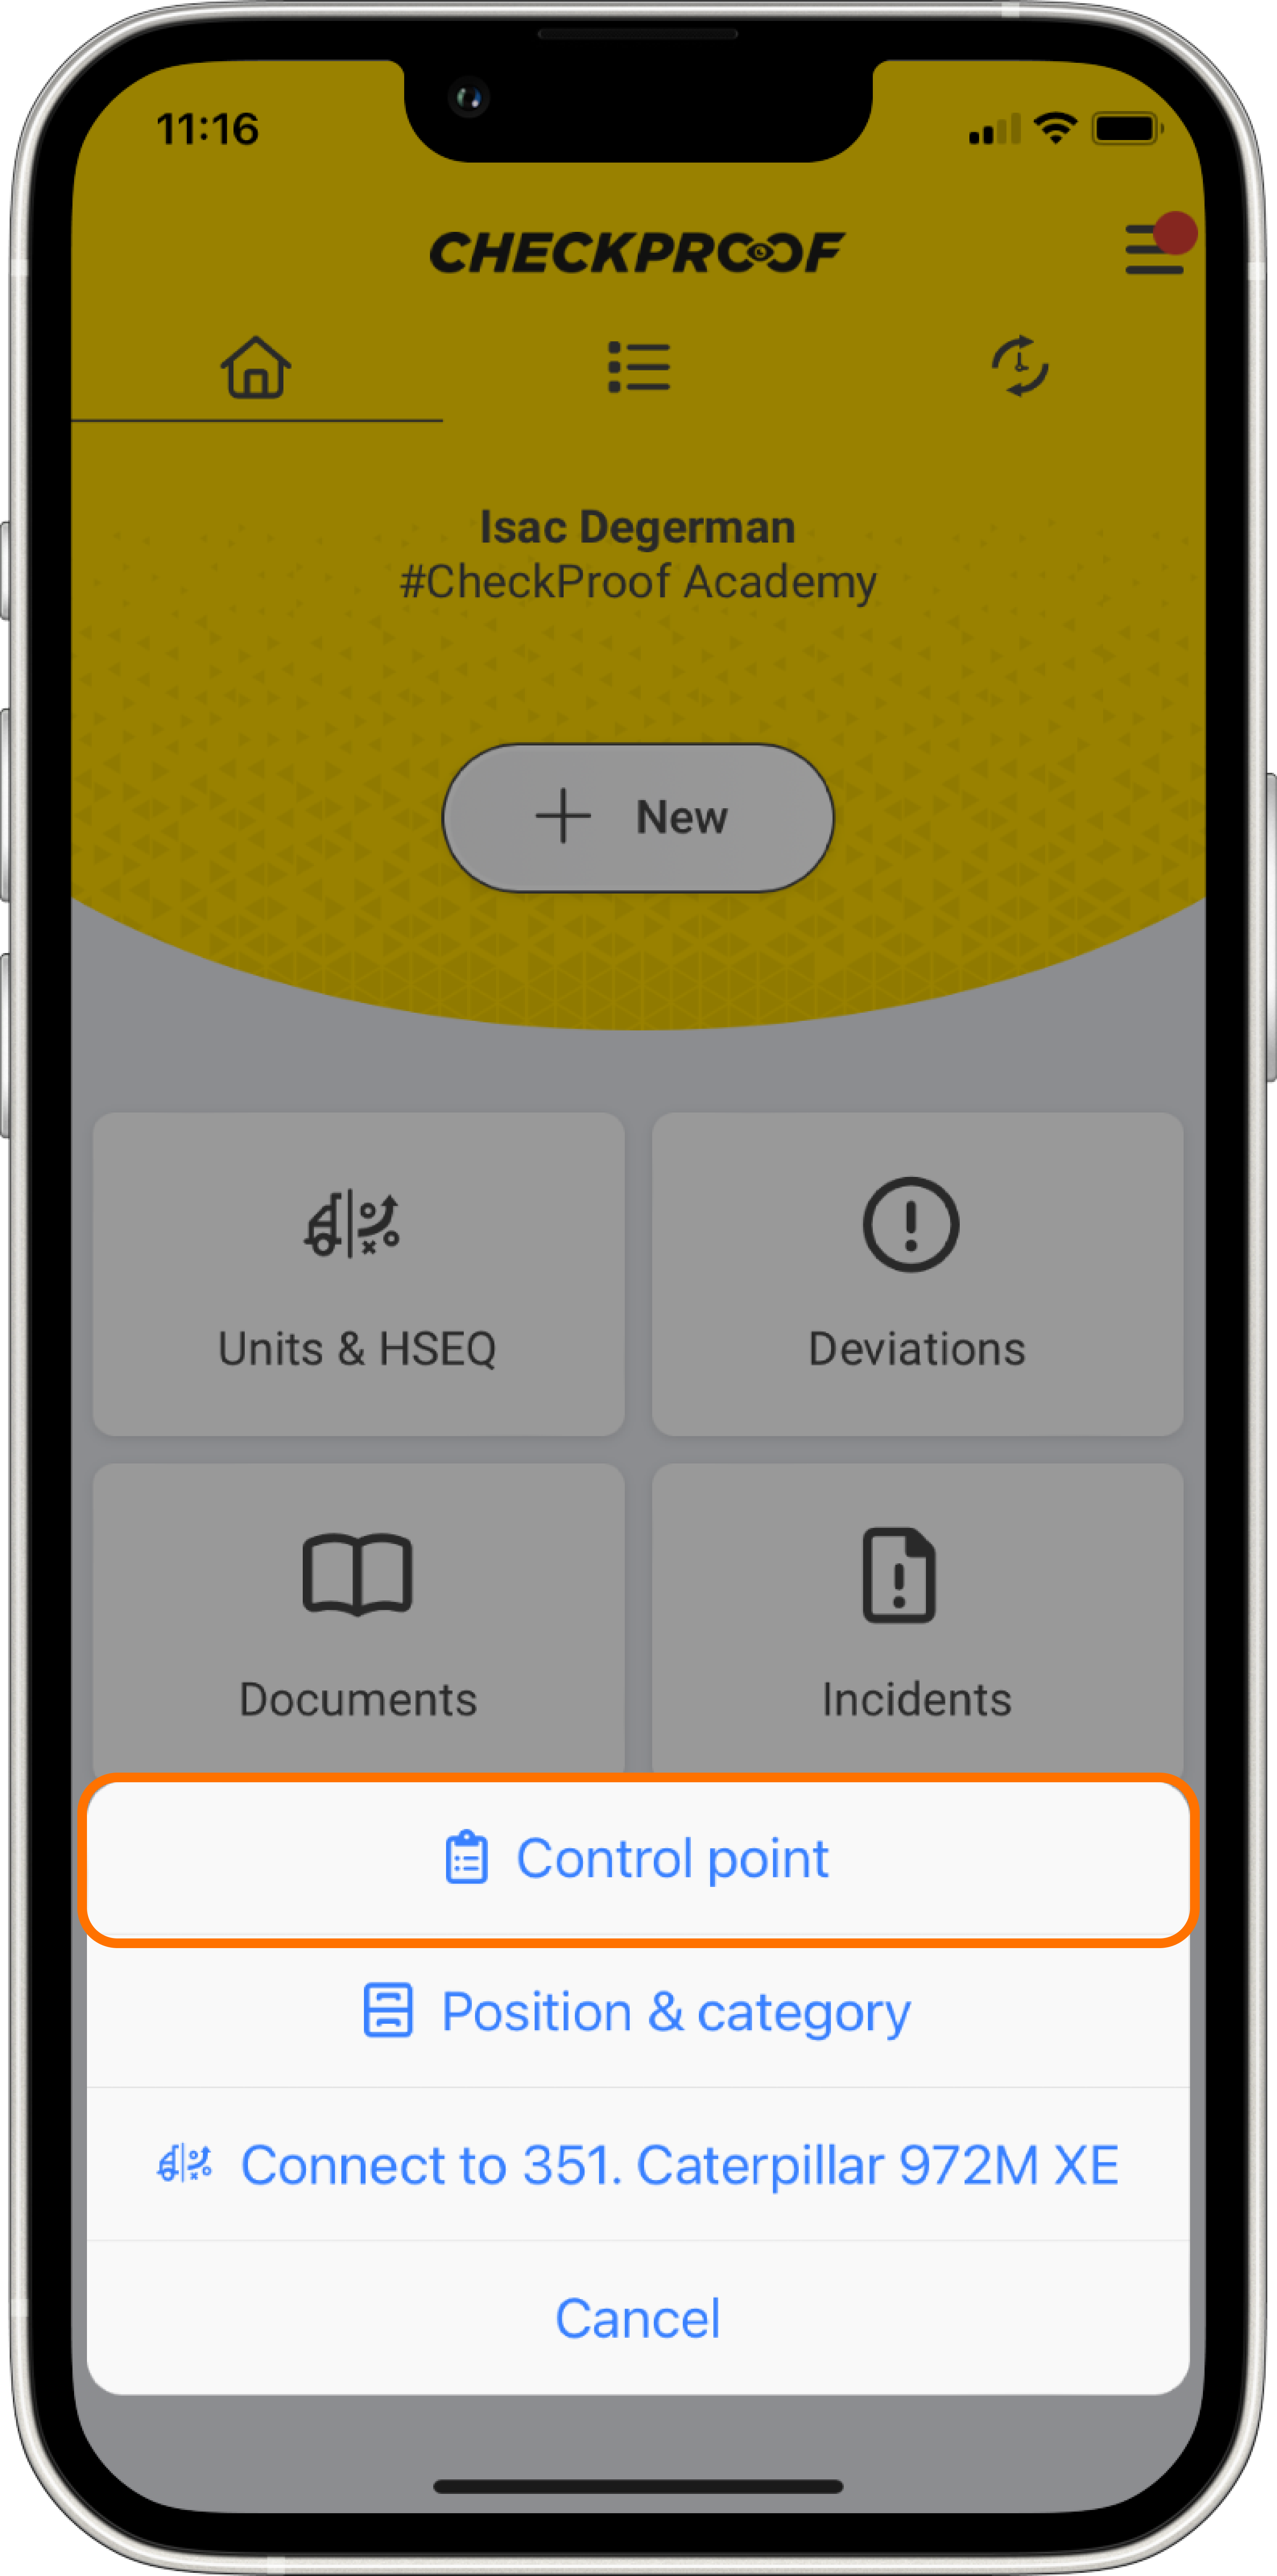
Once you have scanned your tag, you will have the option to link it to any “Control Point” or “Position and Category”. Alternatively, you can choose the third option to link the tag to a specific control point.
You also have the option to connect the tag to a unit or a round.
5
CHOOSE THE TYPE OF CONTROL
Once you have chosen the control you want to link the RFID tag to, you will have the opportunity to select the control question.
You will then be able to scan and activate it.
6
RESCAN THE TAG
To link the RFID tag to your control point, it needs to be scanned one more time.
To do so, scan the RFID tag again so that the control point will be initiated the next time the tag is performed in the app.

Only admins and managers can set up RFID tags.
Great! Now you know how to connect a tag.