
Reporting a New Deviation From Admin
In this lesson you will learn how to place and order a deviation from the Admin Panel.
Note: You can click on any image in this course to magnify it.
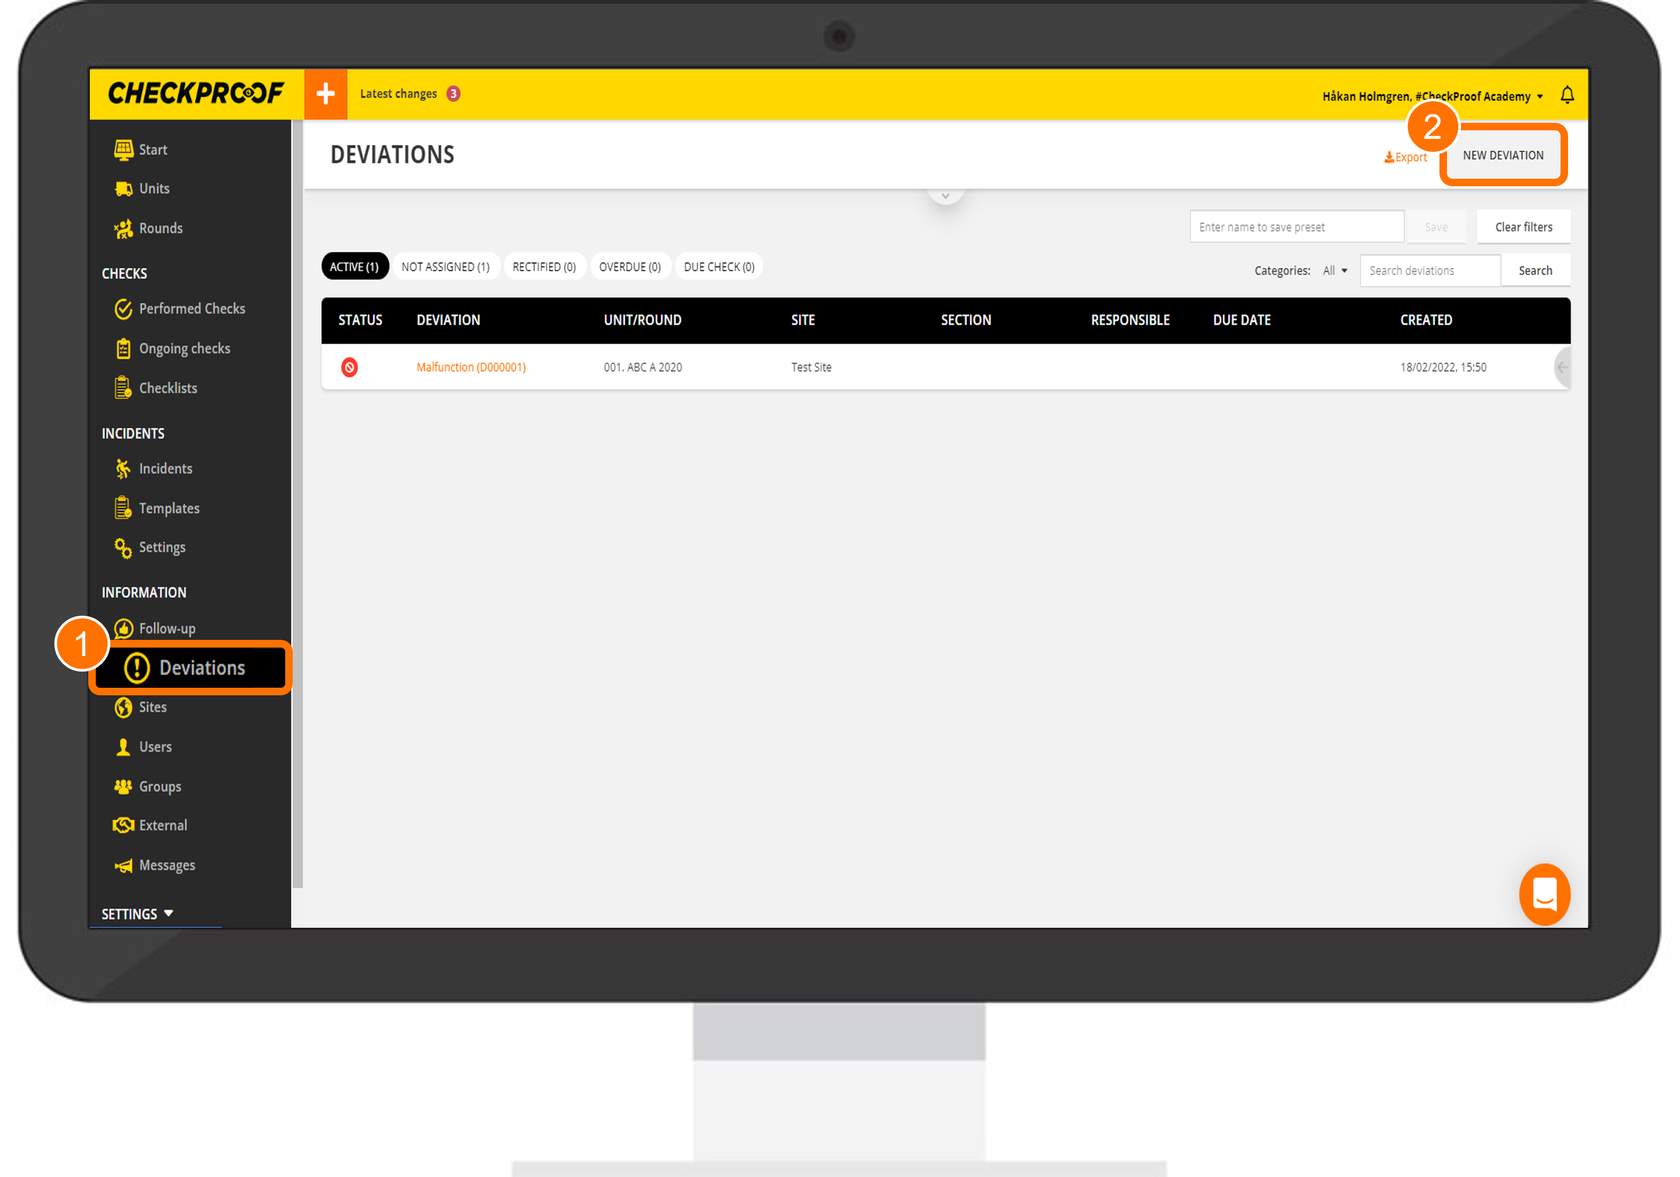
To place a new deviation you first need to click “Deviations” in the left-side panel, and then click the “New Deviation” button that is located in the top-right corner of the page.
Now you will see a form to complete with information regarding the deviation. The fields marked with an asterisk are necessary. Follow the process below to learn how to complete this form.
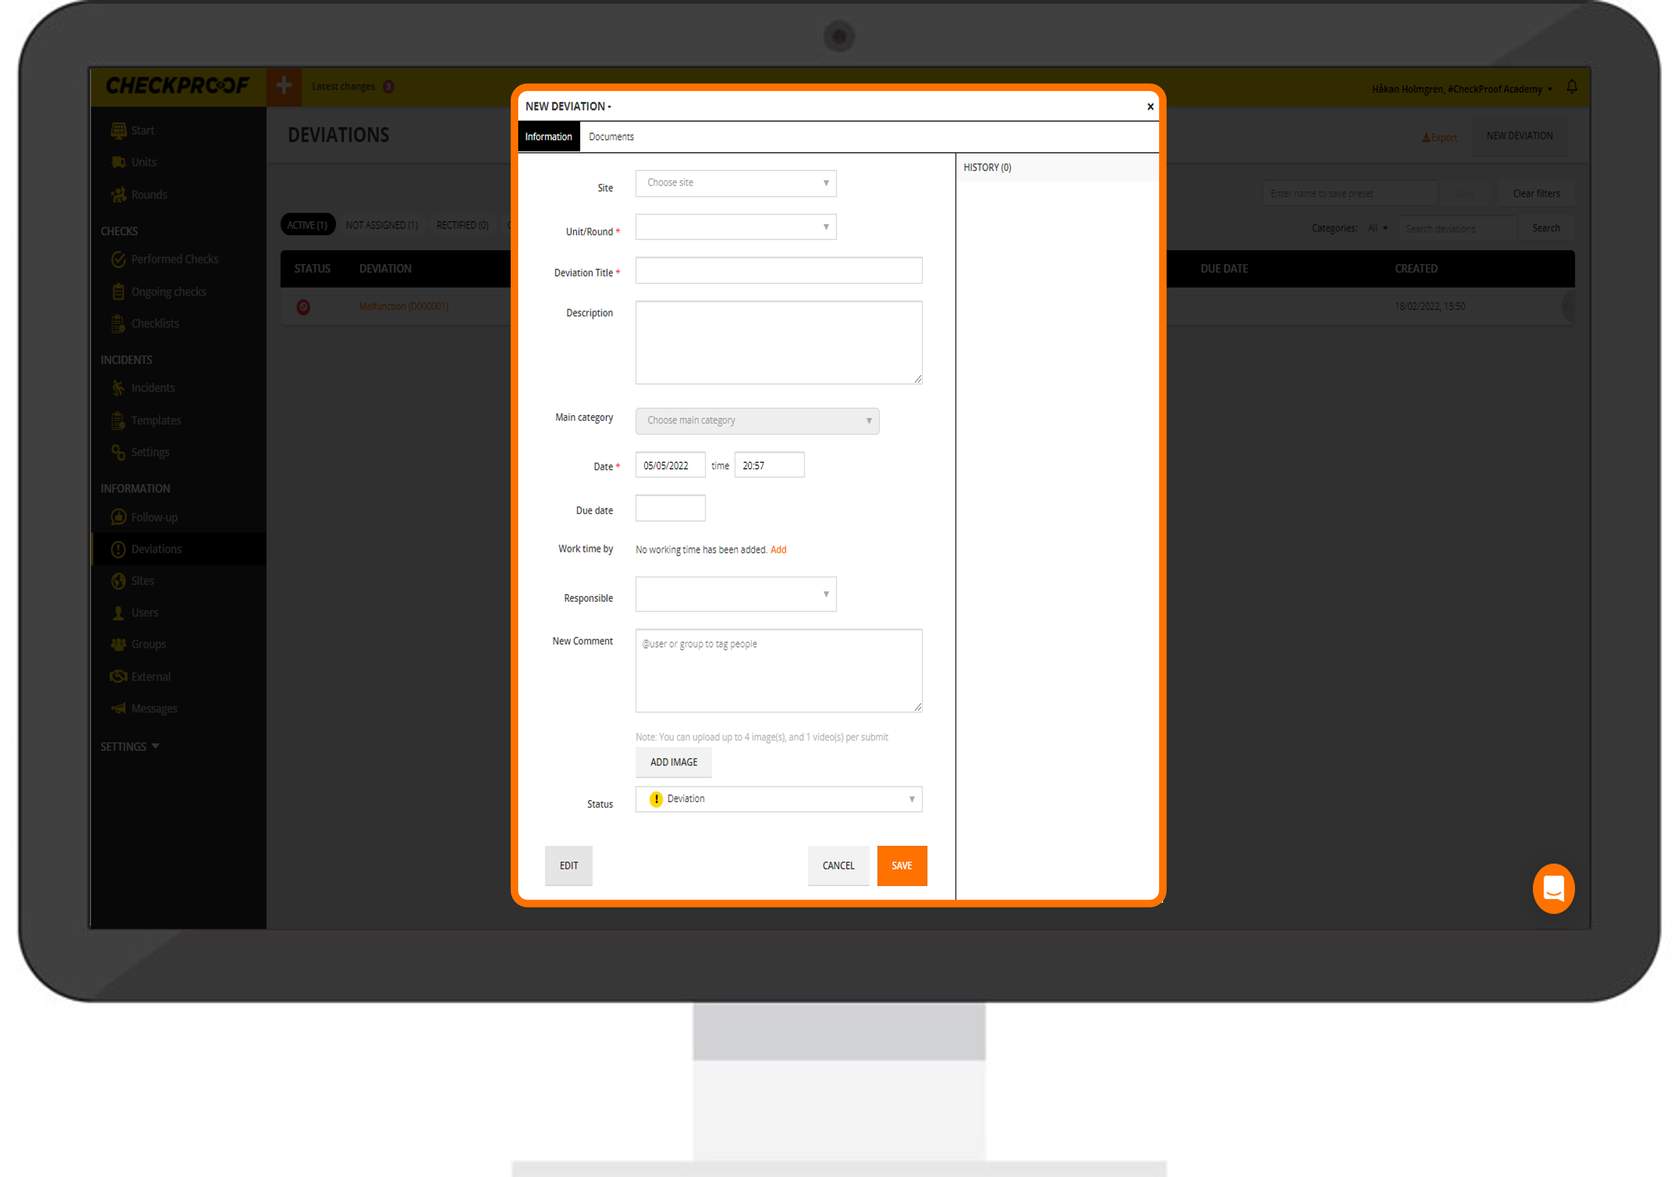
Let’s learn how to complete the form to report a new deviation.
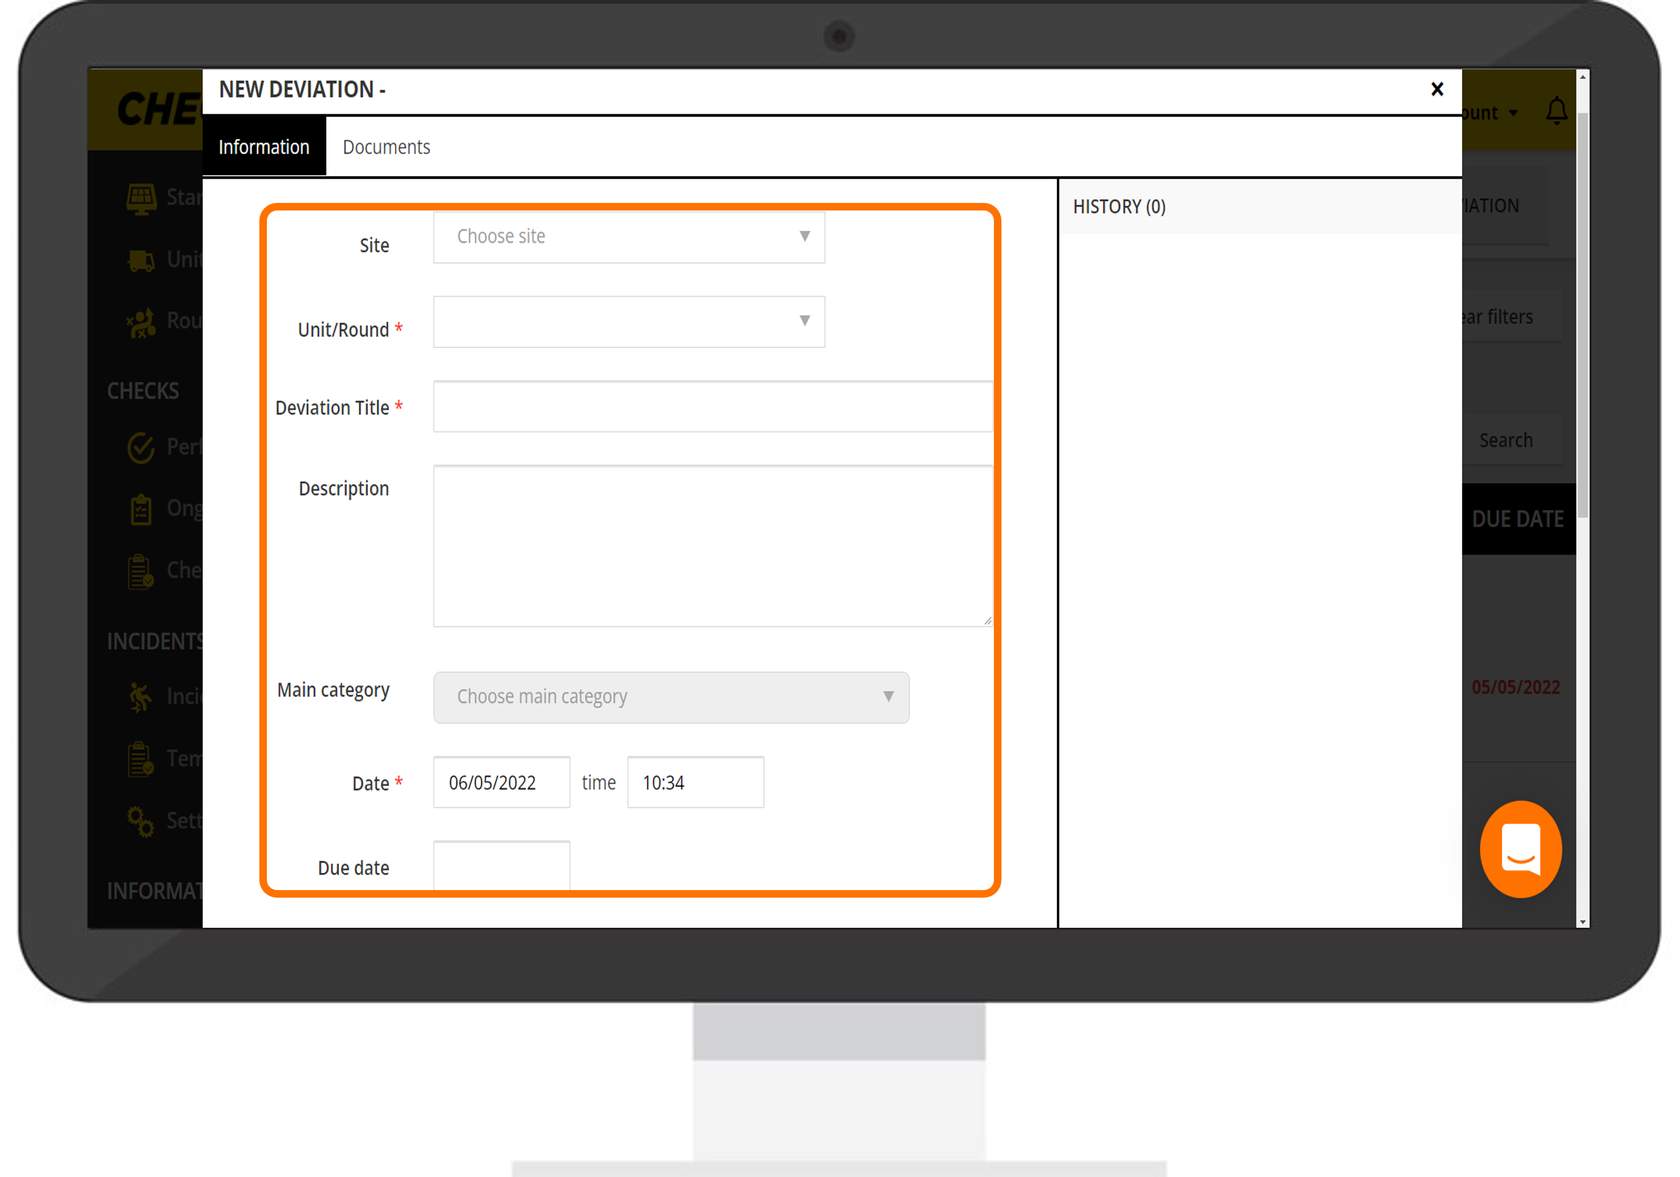
Let’s take a look at the first fields that needs to be completed.
- Site: Here you can select a site to attach this deviation to.
- Unit/Round: Here you must select a unit or round to connect this deviation to.
- Deviation Title: You must give the deviation a title so that it is easily recognizable in the system.
- Description: You can choose to write a description of the deviation to provide further information.
- Main Category: chose among the available categories. Note that you need to select a unit to have this option available.
- Date: Enter the date and time of the deviation.
- Due Date: Select a due date that the deviation should be rectified.

If you want to add work time you can click on “Add” and fill in when and what has been done to rectify the deviation.
- Type of Work Time (optional): Here you can decide what kind of work has been put in e.g. “Planned” or “Unplanned“.
- Date: Here you should enter the date.
- Activity (optional): In this field, you can specify the type of work that needs to be done.
- Description: You can add an optional description to further explain what needs to be done.
- Work Time: Here you can enter the length of time that it should take in HH:MM format.
- User: Select a user from the drop-down list who is to be responsible for the task.
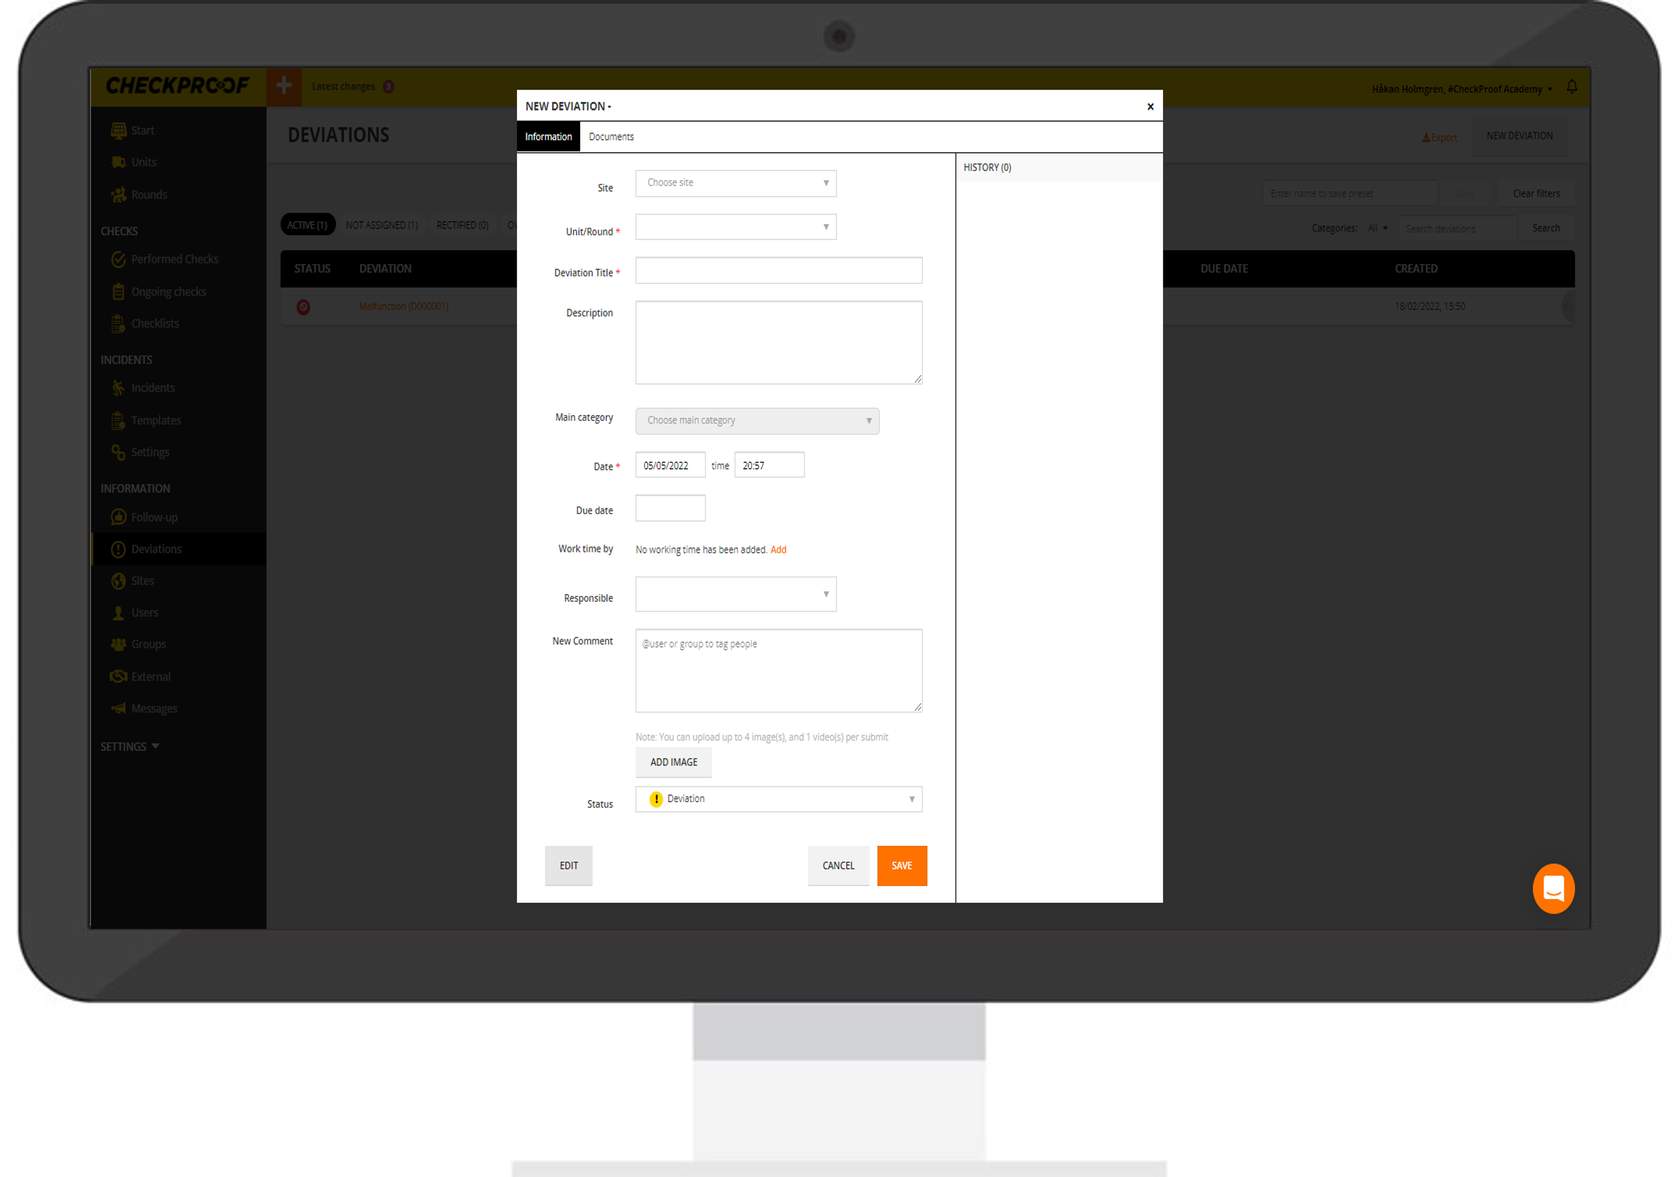
Now let’s take a look at the rest of the fields that you can complete.
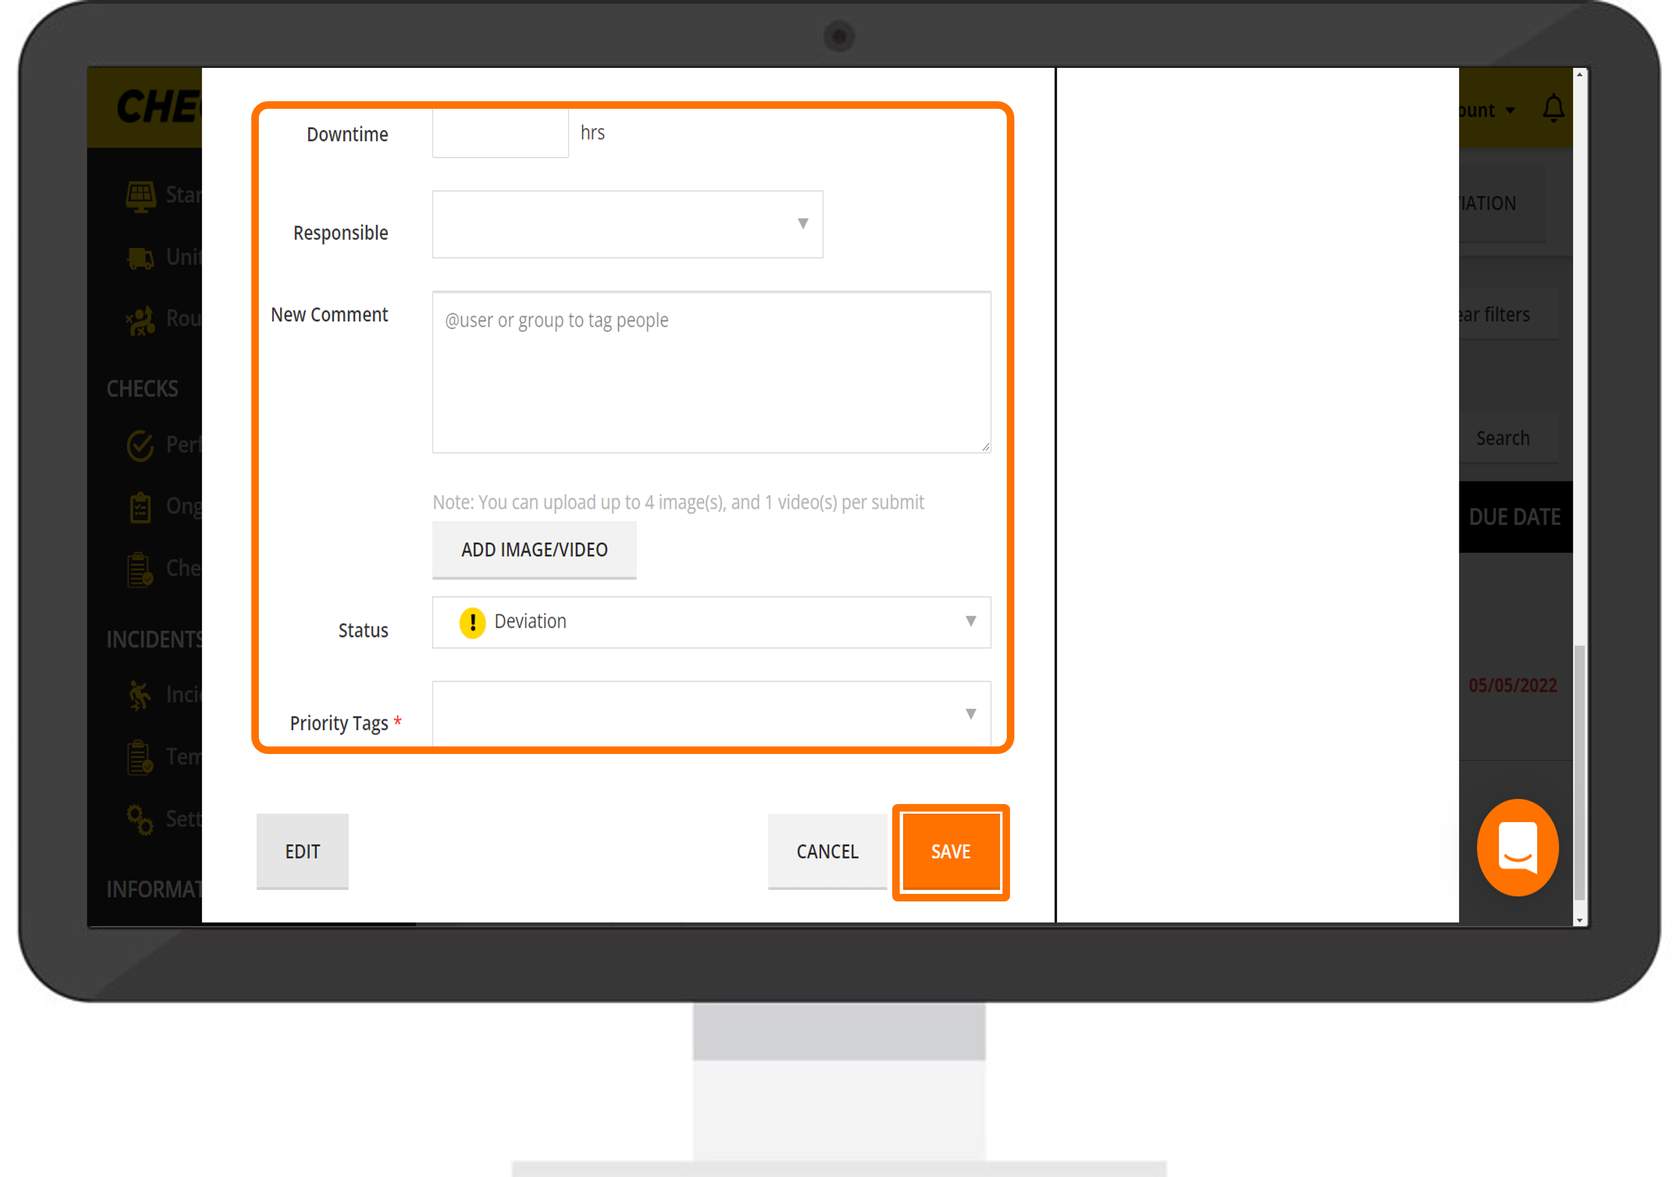
- Downtime: Here you can type the number of hours of downtime that is expected.
- Responsible: You can select who is to be responsible for the deviation from the drop-down list.
- New Comment: Here you can add a comment to give further information. You can tag a user or group in the deviation by adding the “@” symbol before their name.
- Add Image/Video: You can use this button to upload an image or video from your device.
- Status: Here you can select the status of the deviation. You can choose from “Serious Malfunctioning”, “Deviation”, or “Rectified”.
- Priority Tags (optional): These priority tags can be created and customized to your company’s needs in the “Company Settings”. E.g. “1 – Now (Super Urgent)”, “2 – Today”, “3 – This Week”, and “4 – This Month”.
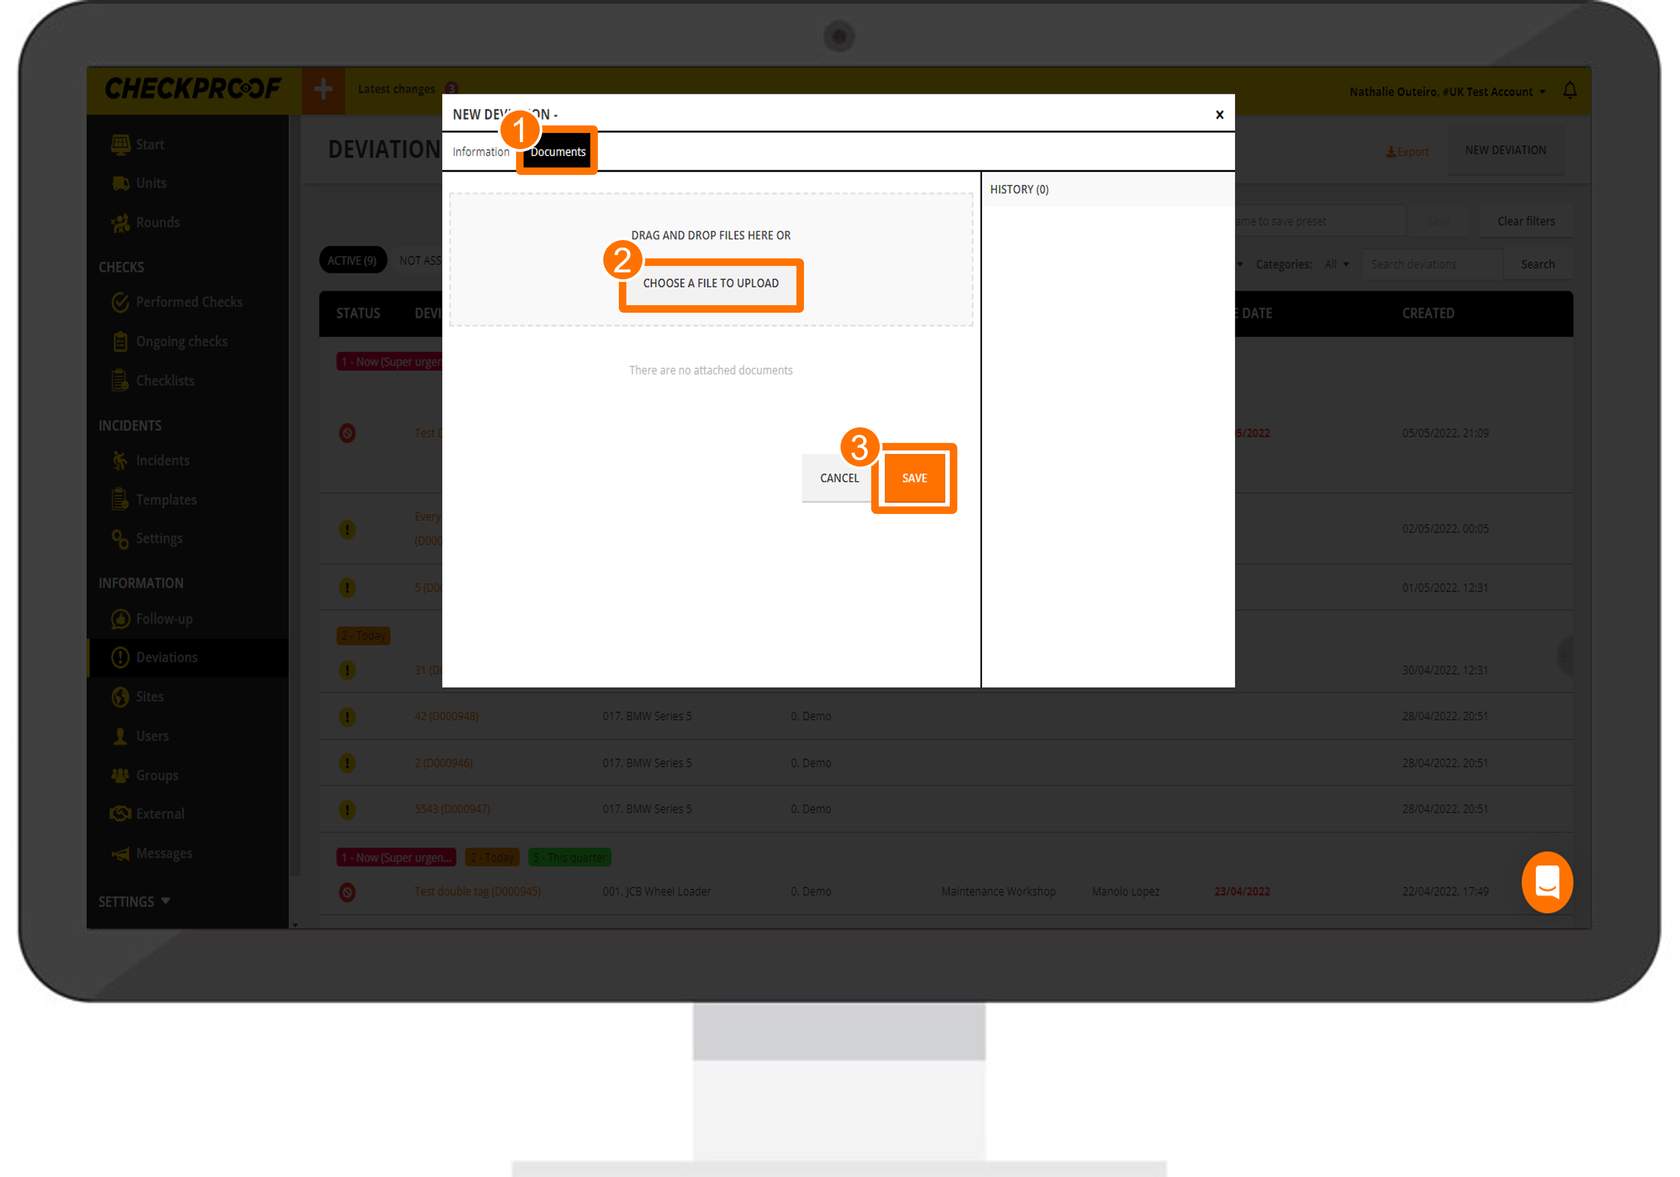
If necessary, you can also attach a document(s) to the deviation. To do this:
- Click on the “Documents” button.
- Click the “Choose a File to Upload” button and select the document from your device.
- Click the “Save” button.