
Creating New User
Let’s learn about different users and how to add them to sites from the Admin Panel.
New Users
As an admin you can create different types of users from the Admin Panel:
- Users
- Incident Users
- Managers
- Admins
- Observers
Let’s learn how to create a new user.
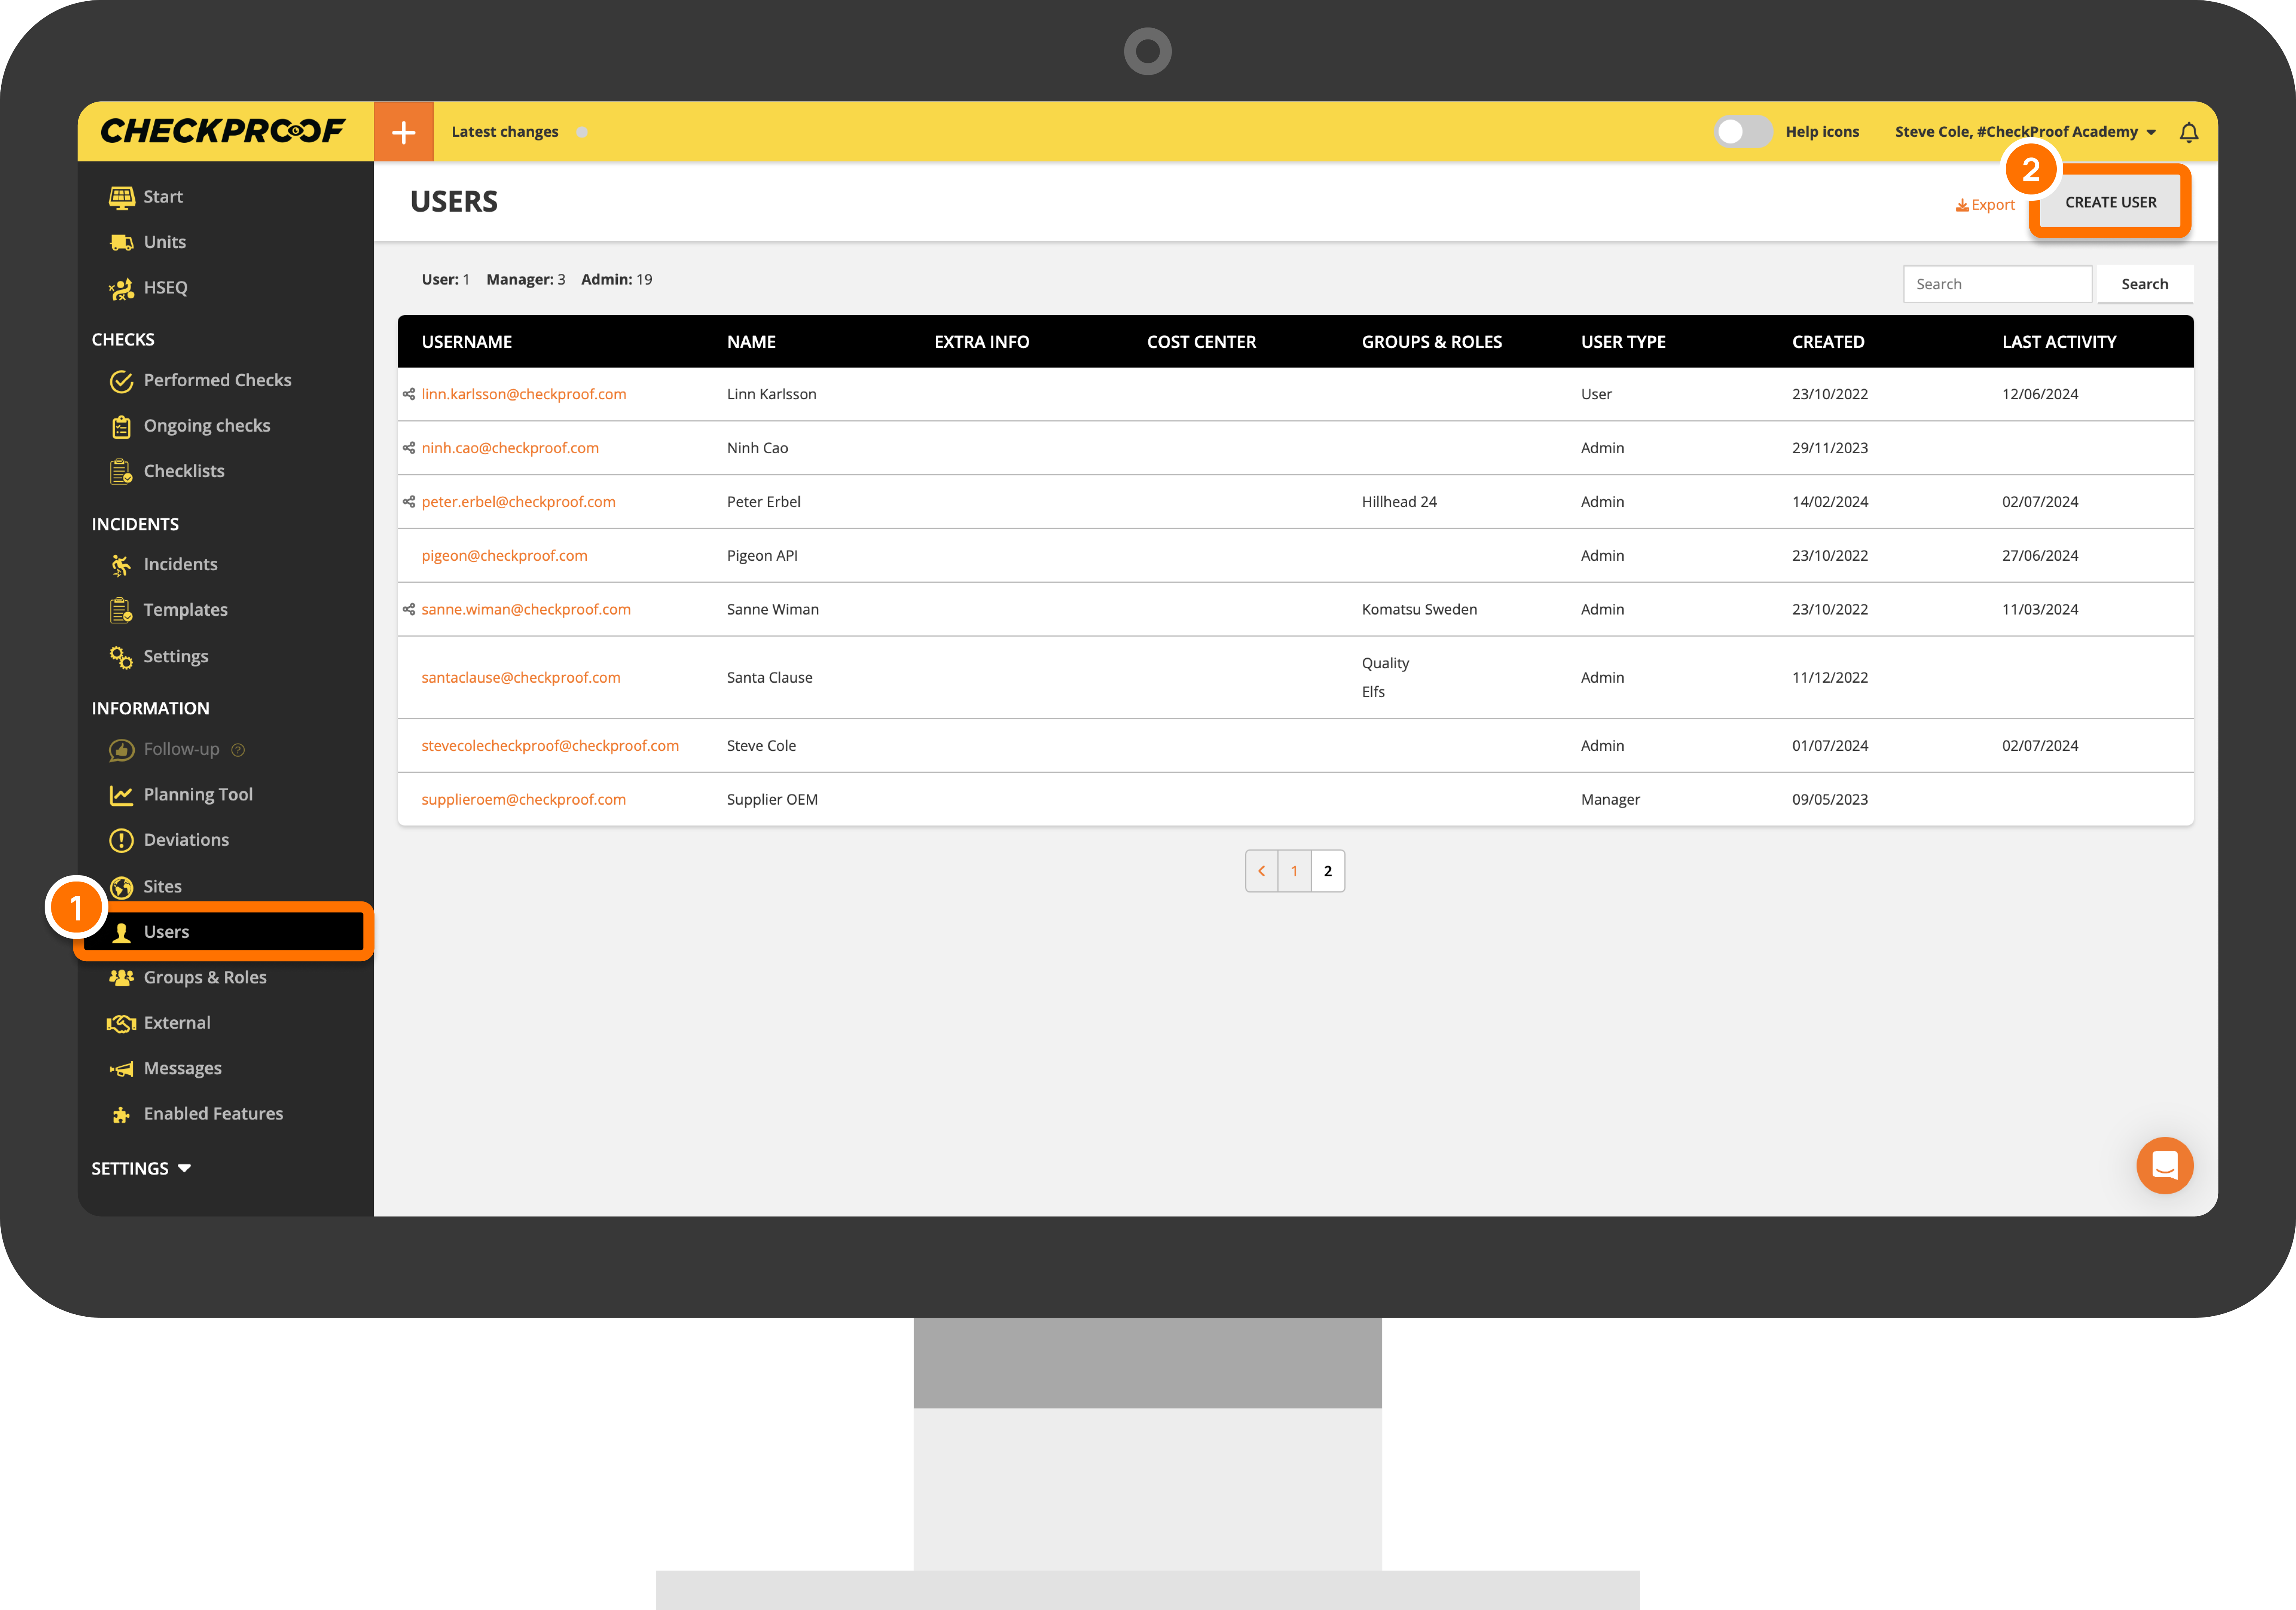
NAVIGATE TO THE FORM
To create a new user, you must first navigate to the “Create User” form.
To do this, click on “Users” in the side panel menu and then click the “Create User” button at the top-right corner of the screen.
Each type of user has different requirements, let’s see how to customize each one of them
.
1
User
You will now see the form that appears when you add a user to your company.

In the “User Type” section, select “User” from the drop-down menu. Complete the mandatory fields that remain, they are marked with an asterisk.
You can decide whether the user will log in with their phone number and a PIN code, or with their email address and a password. In this example, we have chosen the first option.
- Phone No.
- PIN No.
- First Name
- Surname
In this first section, you can also choose the user’s language and enable or disable the RFID feature.
In the second and third sections that follow, you will set the user’s permissions. Users can have different permissions at different sites.
You can connect a user to a site and/or section by clicking the “Sites & Sections” drop-down list and selecting the site or section you want to connect them to.
When you have finished completing the form, click on the “Save” button to add the user.

2
Incident User
You will now see the form that appears when you add an incident user to your company.
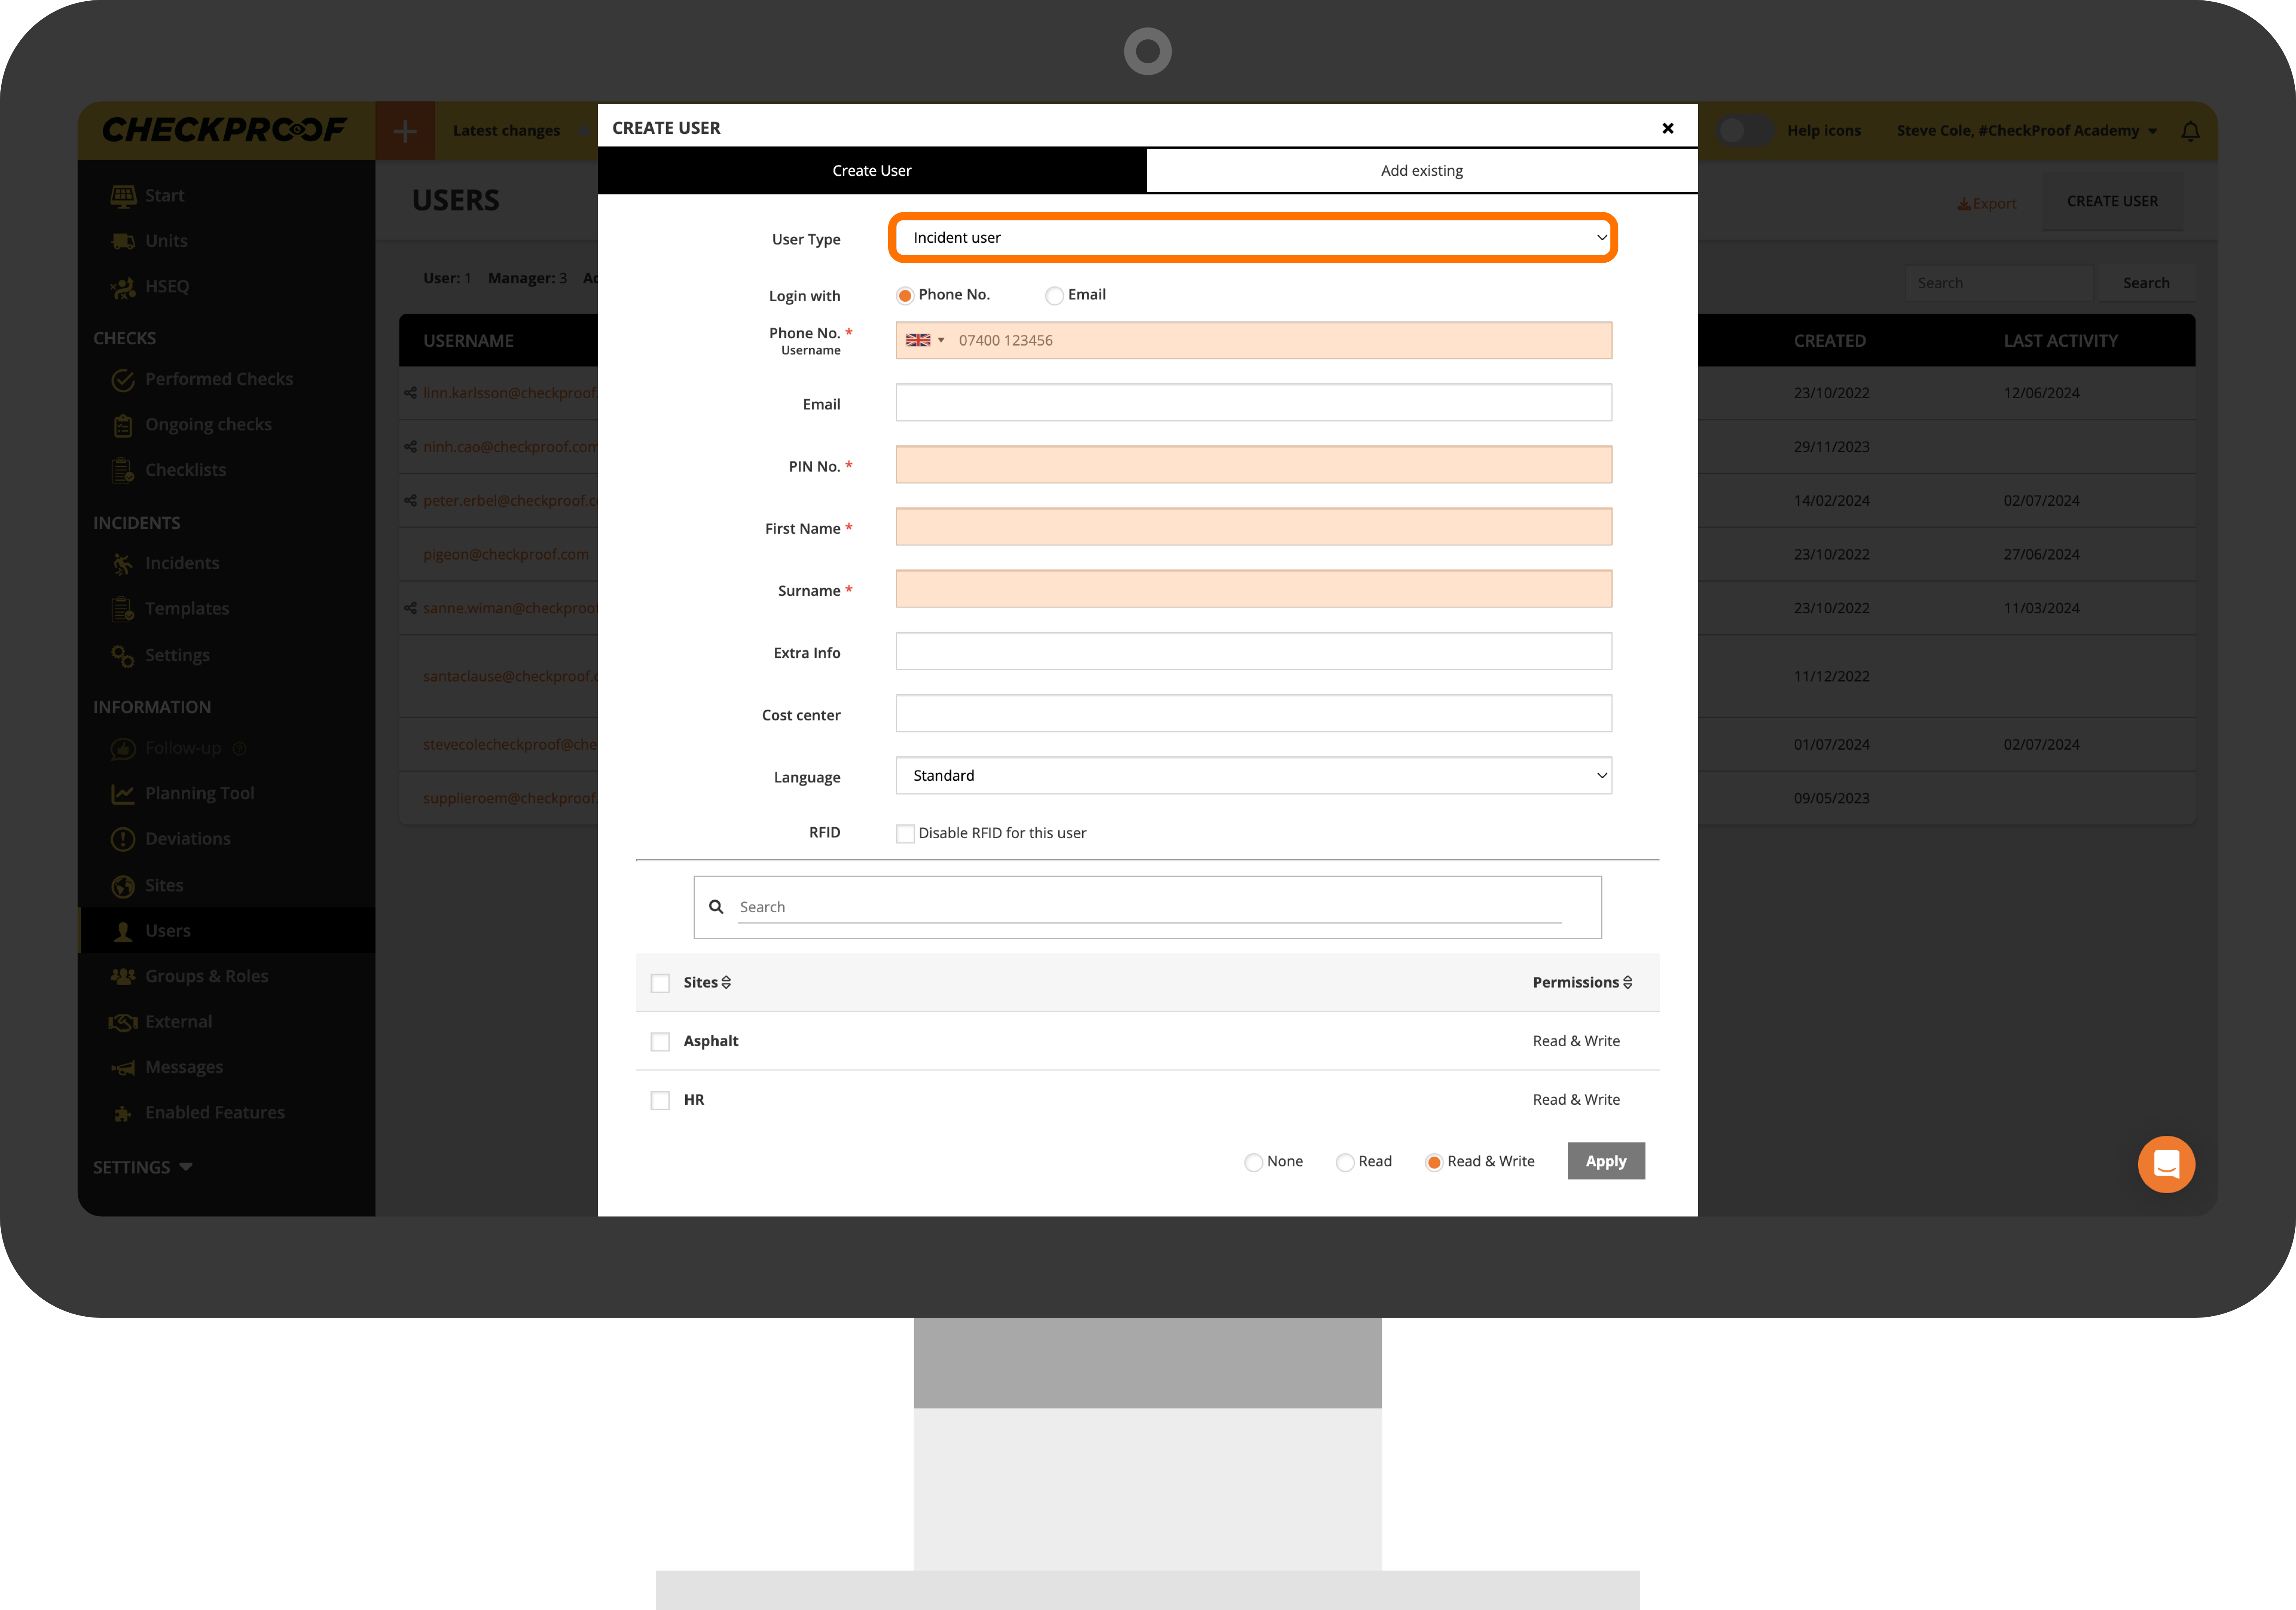
In the “User Type” section, select “Incident User” from the drop-down menu. Complete the mandatory fields that remain, they are marked with an asterisk.
3
Manager
You will now see the form that appears when you add a manager to your company.

In the “User Type” section, select “Manager” from the drop-down menu. Complete the mandatory fields that remain, they are marked with an asterisk:
- Password
- Repeat Password
- First Name
- Surname
A manager can only log in with an email address and password, therefore, the “Phone No.” field is not mandatory.
In this first section, you can also choose the user’s language and enable or disable the RFID feature.
In the following second and third sections, you will set the manager’s permissions (the same way you did with the regular user). Managers can have different permissions at different sites.
You can connect a user to a site and/or section by checking the box next to the site or section you want to connect them to.
When you have finished completing the form, click on the “Save” button to add the user.

4
Admin
You will now see the form that appears when you add an admin to your company.
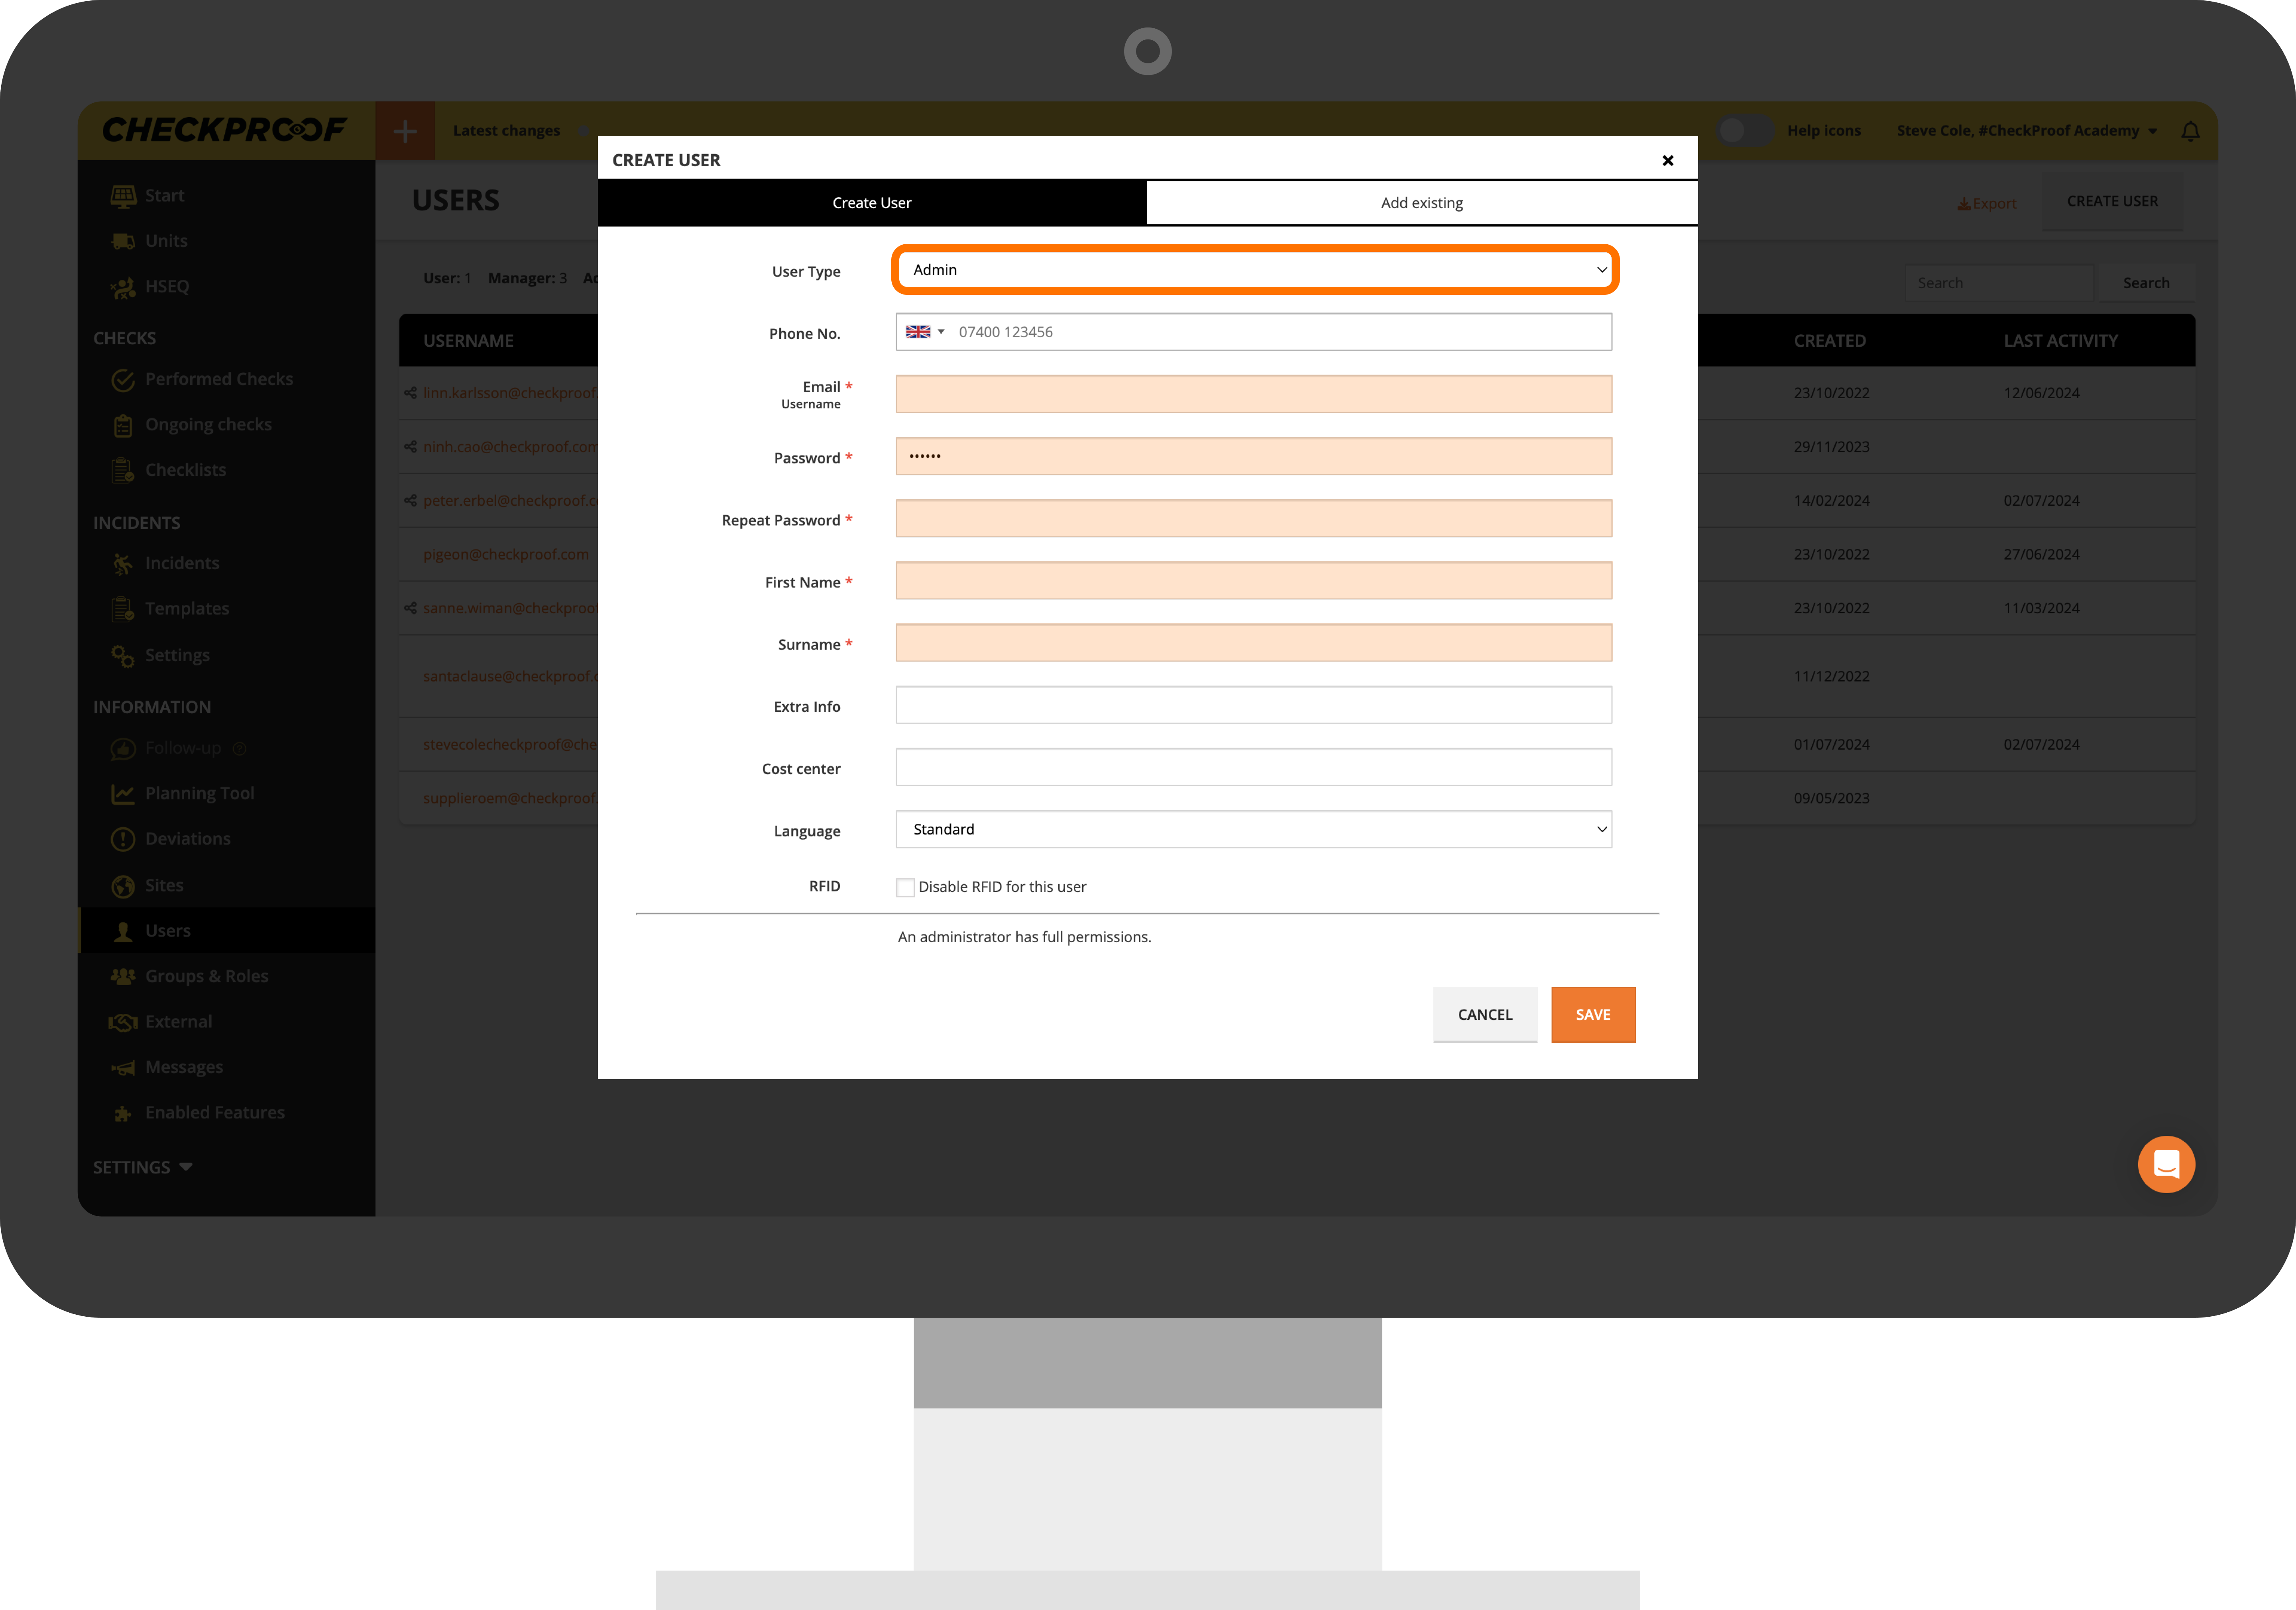
In the “User Type” section, select “Admin” from the drop-down menu. Complete the mandatory fields that remain, they are marked with an asterisk:
- Password
- Repeat Password
- First Name
- Surname
An admin can only log in with an email address and password, therefore, the “Phone No.” field is not mandatory.
When you have finished completing the form, click on the “Save” button to add the user.
5
Observer
You will now see the form that appears when you add an observer to your company.
In the “User Type” section, select “Observer” from the drop-down menu. Complete the mandatory fields that remain, they are marked with an asterisk:
- Password
- Repeat Password
- First Name
- Surname
In this first section, you can also choose the user’s language and enable or disable the RFID feature.
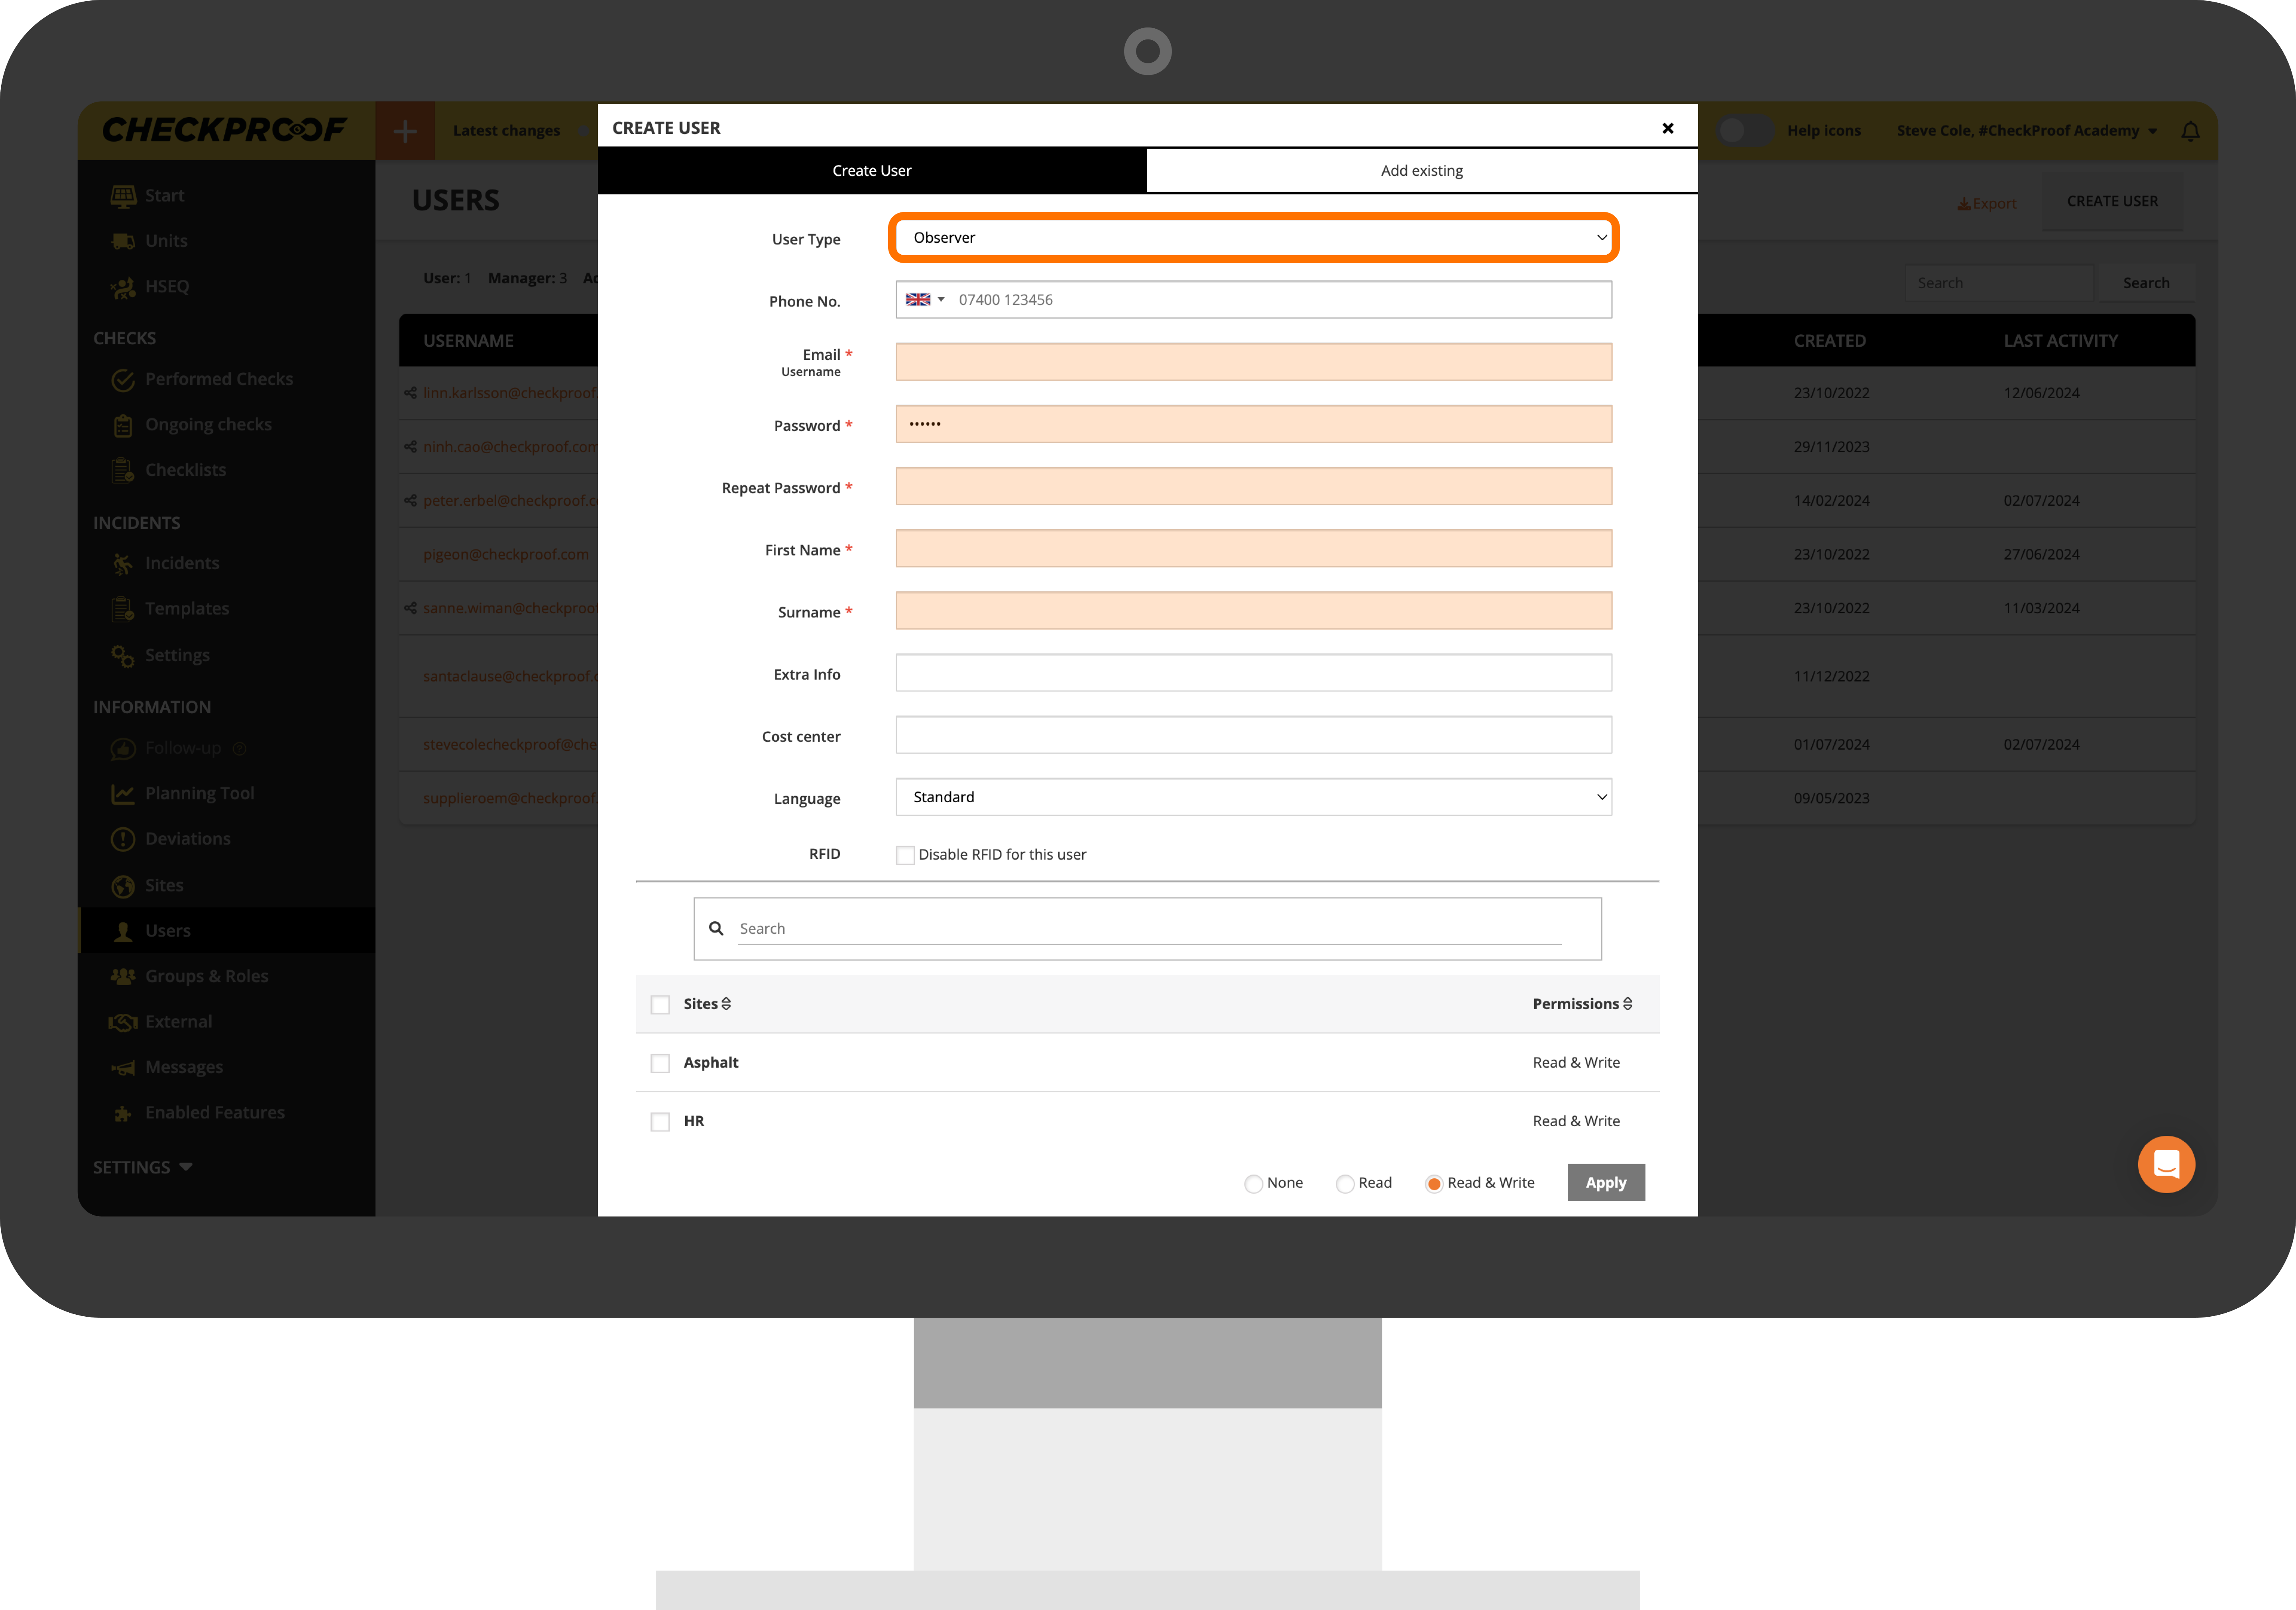
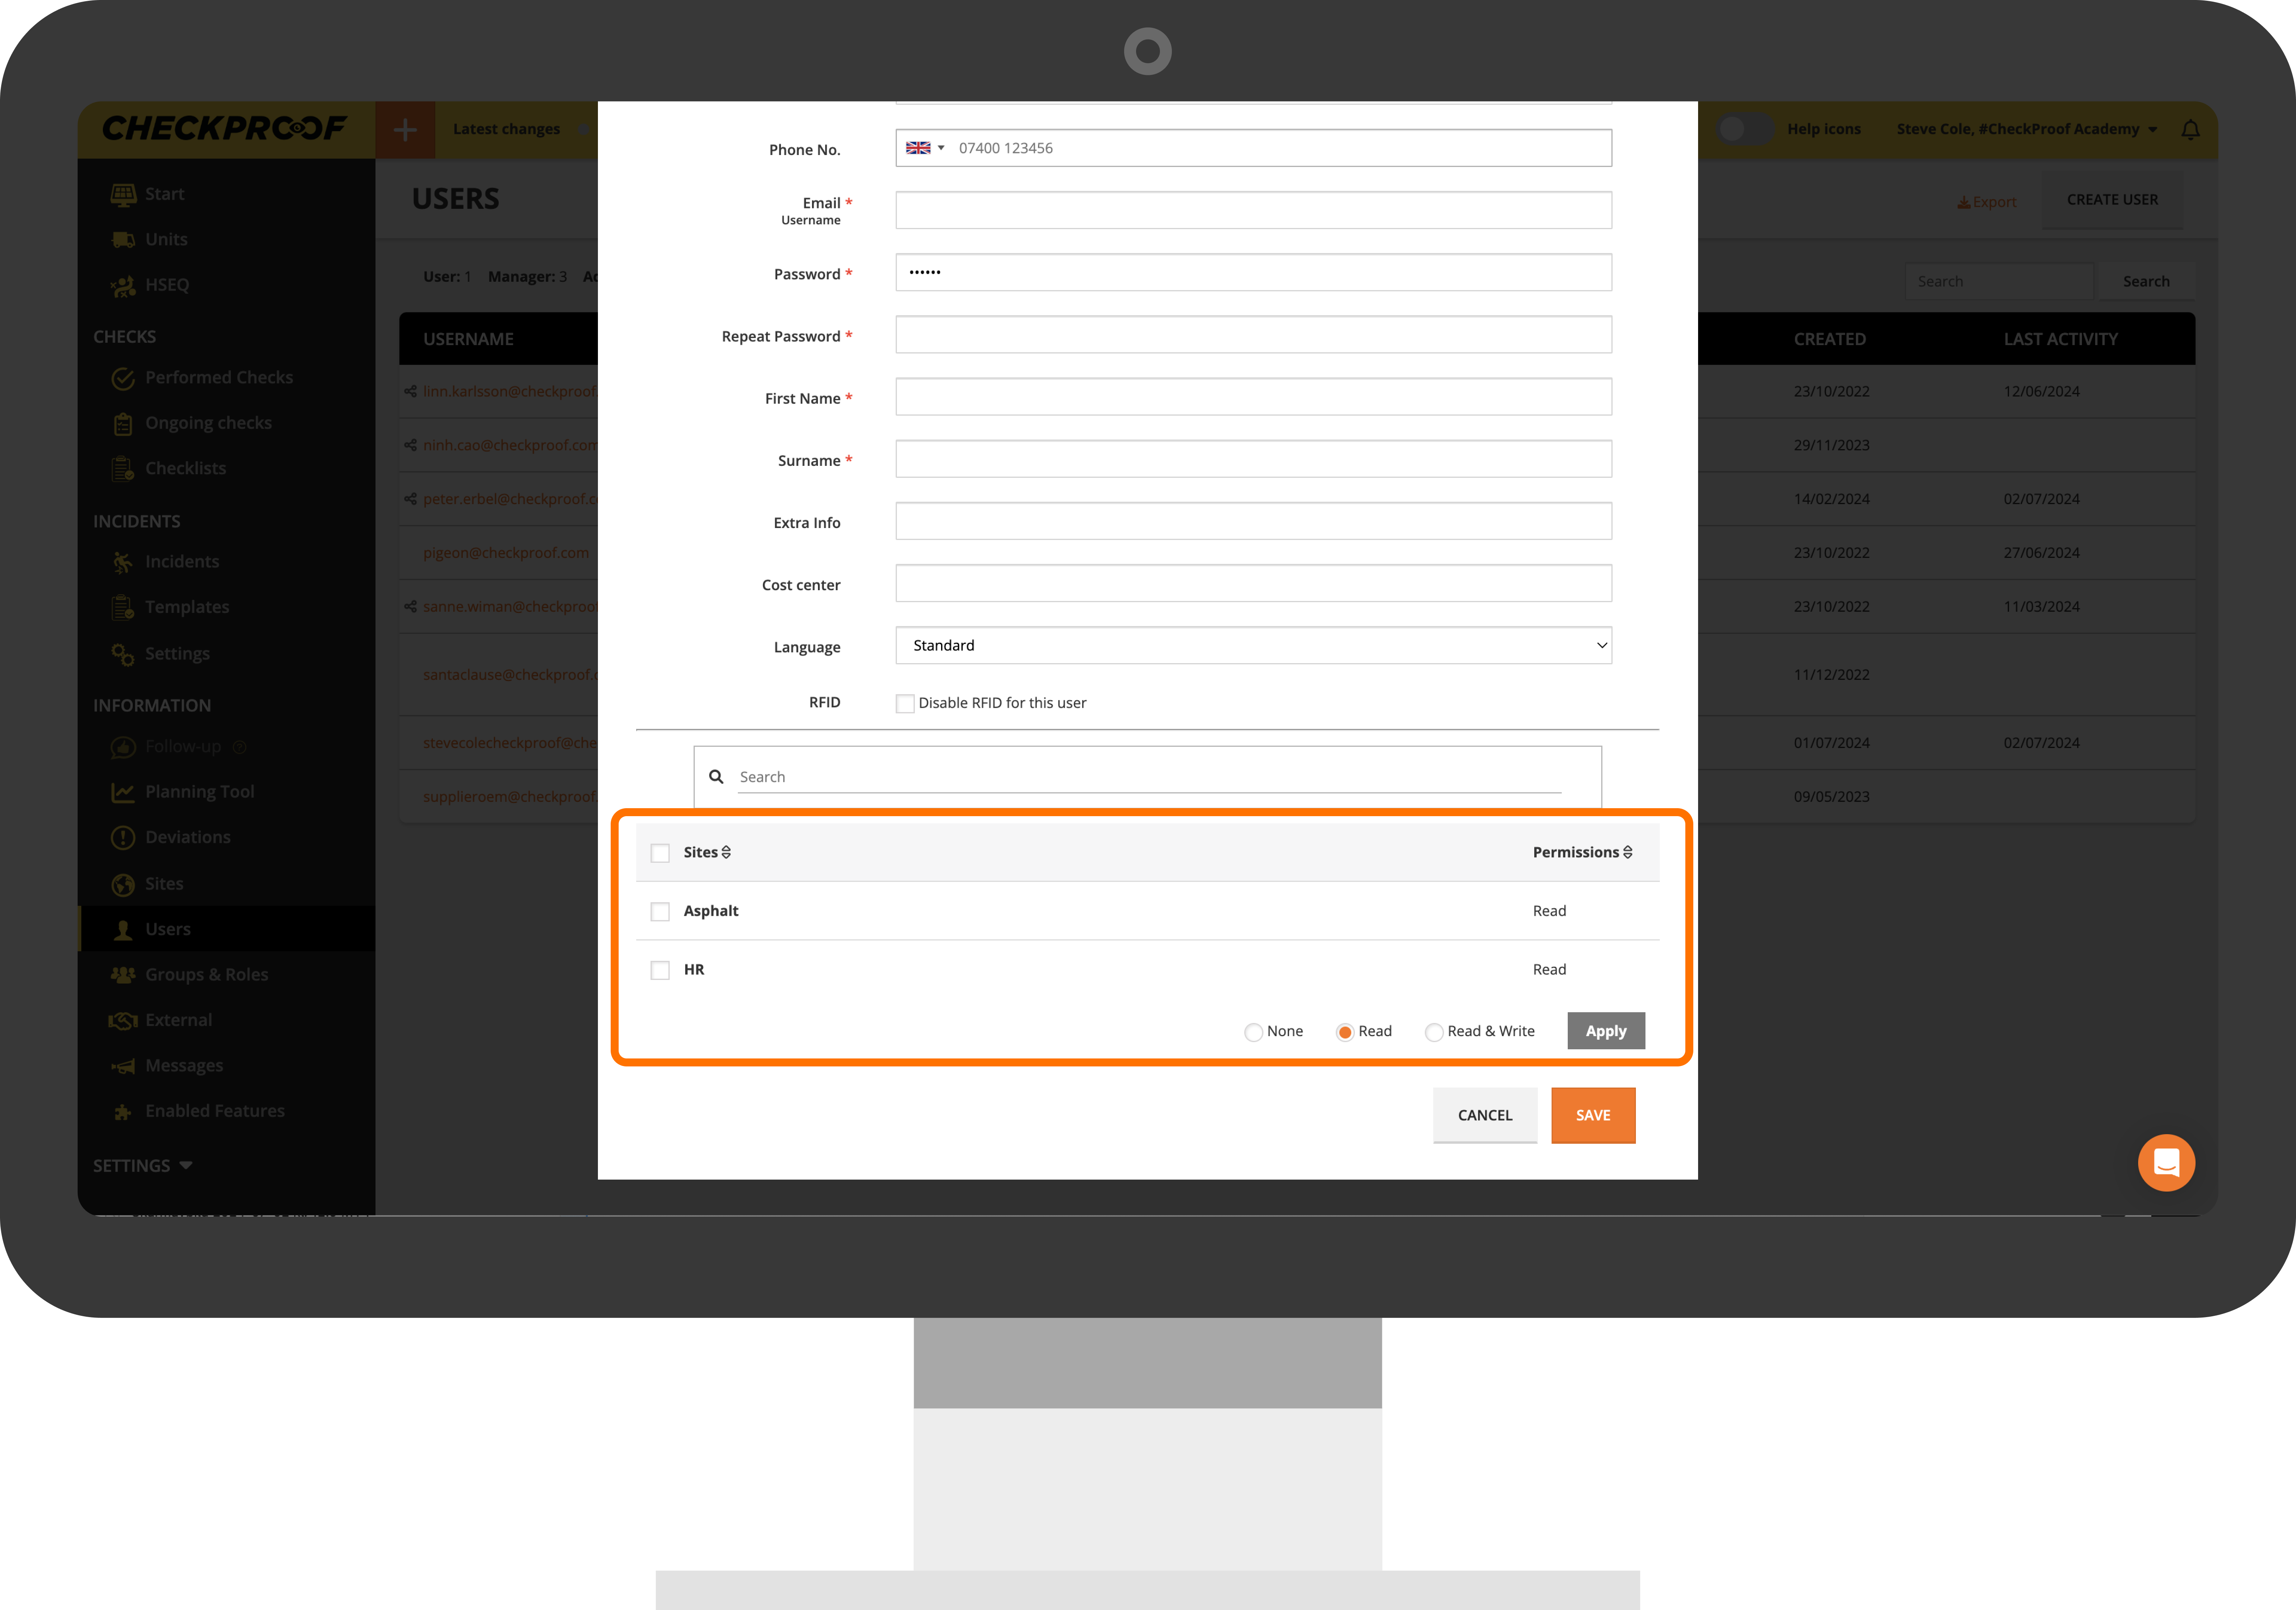
In the second and third sections that follow, you will set the observer’s permissions. Observers can only be assigned read permissions.
Check the “Read” box next to each site you want the observer to be added to.
When you have finished completing the form, click on the “Save” button to add the user.
Great! Now you understand the different types of users and how to add them to a site(s) from the Admin Panel.